During the installation process, you were prompted to enter a hostname for your server. Specifically, during the
initial setup process, the field was named "Your server's name."
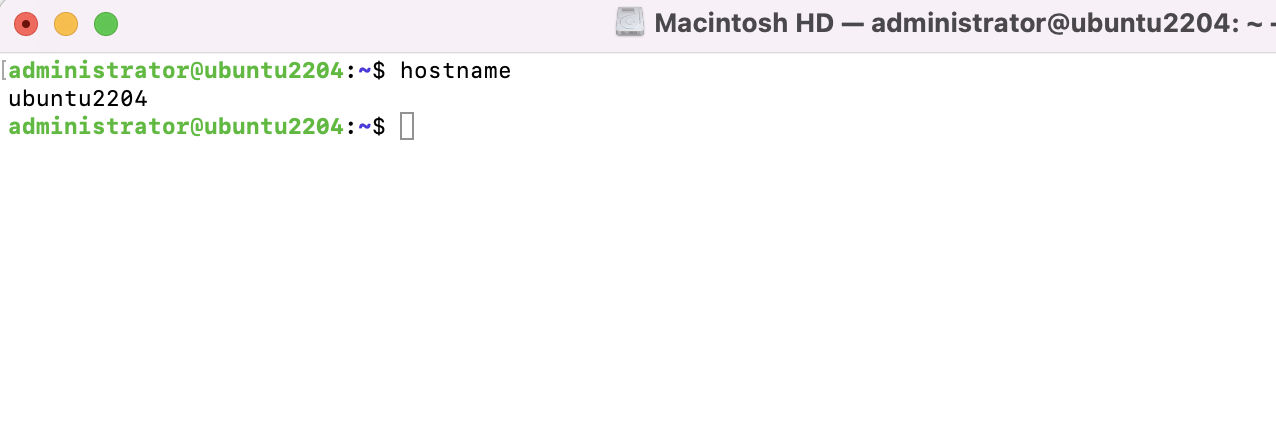
Step 1. To see the whole hostname, use the "hostname" command:
Step 2. Changing the hostname is a straightforward process. To accomplish this, we
can use the "hostnamectl" command as "root" or "sudo."

Step 3. That's all well and good, but what exactly
does that command do? I'd love to give you a detailed explanation, but all it actually does is update the contents
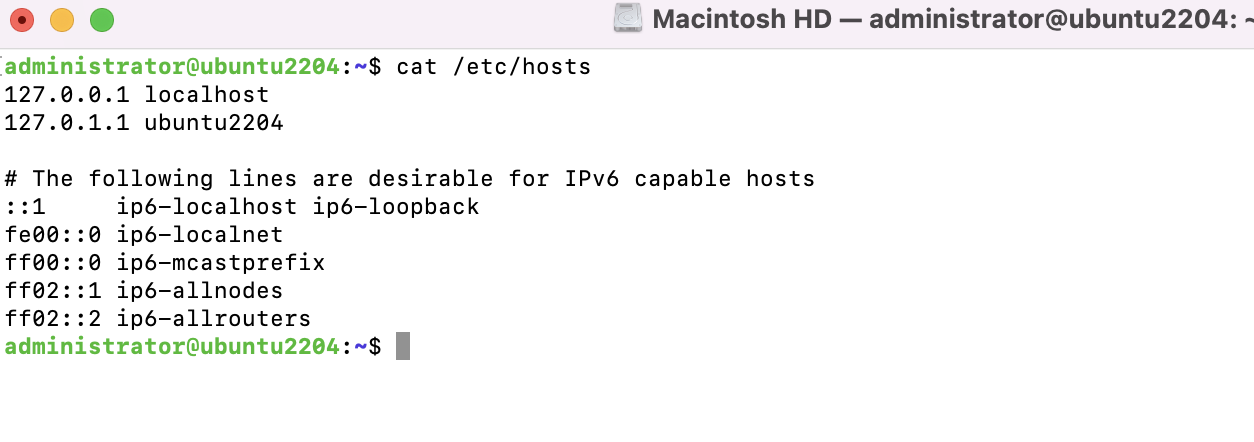
of a text file (particularly, /etc/hostname). To verify this, run the cat
command to inspect the contents of this file before and after making the change with hostnamectl:
Step 4. You'll notice that this file just provides
your hostname.

Step 5. After changing your hostname, you may get an error message similar to the one below after
executing various commands:
Step 6. This error indicates that the computer can no longer resolve your local hostname. This is
due to the fact that your hostname is not only stored in the "/etc/hostname" file; it is also referenced in
"/etc/hosts." Unfortunately, the "hostnamectl" command does not
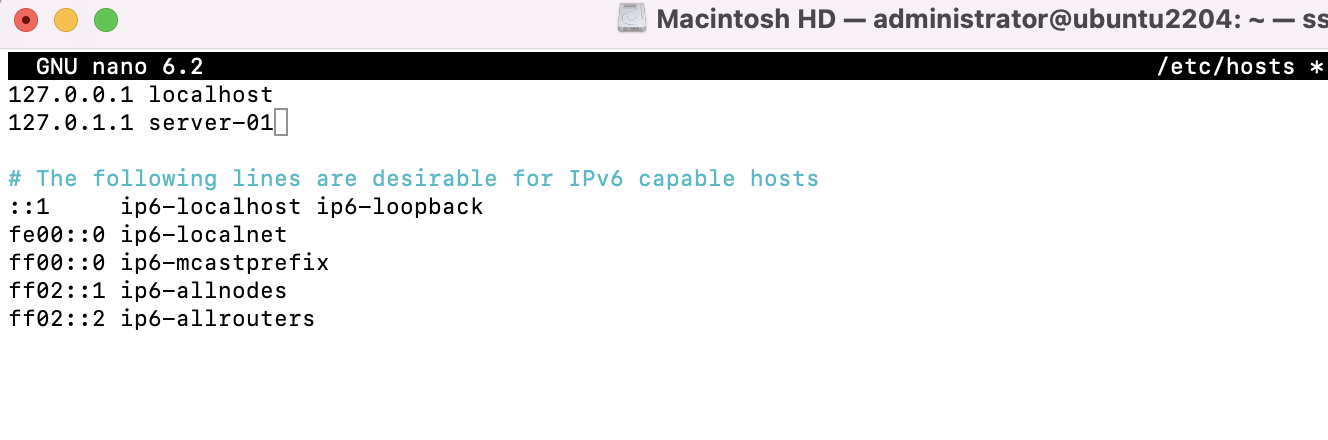
change "/etc/hosts," thus you must manually edit that file to resolve the problem. On an example server,
the /etc/hosts file looks like this:
Step 7. Open the file and replace the old hostname with the new.