To install and configure Apache virtual host on Ubuntu 24.04, follow these steps:
Step 1 : First, make sure your package lists are up-to-date by running:

Step 2 : If Apache is not already installed, you can install it by running:

Step 3 : Create a directory to store your website files. For example:

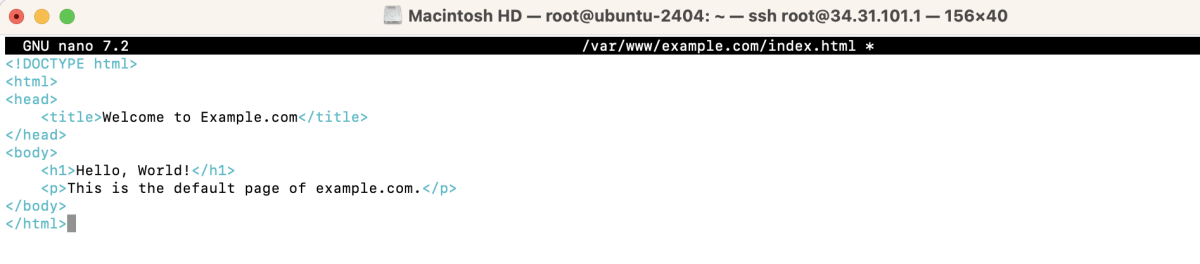
Step 4 : Create a simple HTML file as the main page of your website:
Add some content to this file, such as:
Step 5 : Make sure the directory and files are accessible by Apache:

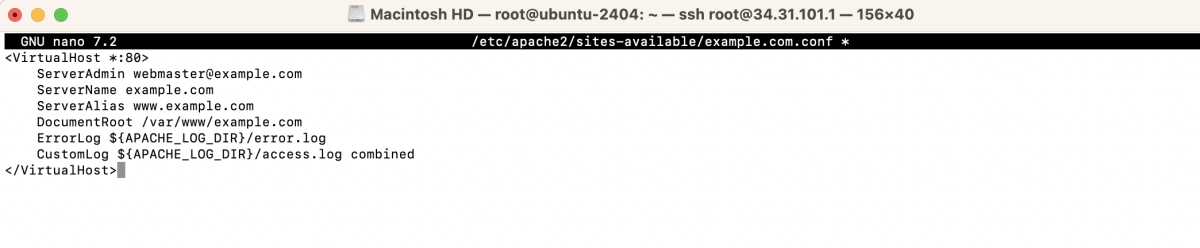
Step 6 : Create a new virtual host configuration file. For example:
Add the following content, replacing example.com with your domain name:
Step 7 : Enable the virtual host configuration you just created:

Step 8 : Test the Apache configuration for syntax errors:

If the test is successful, restart Apache for the changes to take effect:

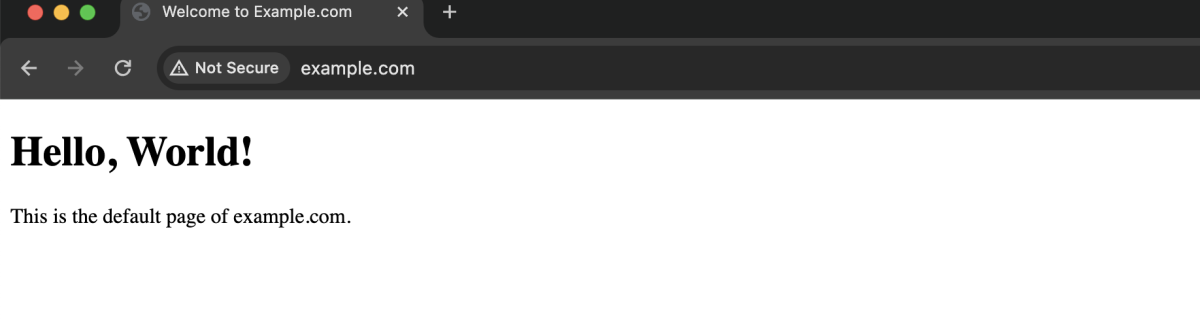
Step 9 : Open a web browser and navigate to your domain (e.g., http://example.com) to see your website.
Congratulations! You have successfully set up and configured an Apache virtual host on Ubuntu 24.04.