To configure SSL for Apache on Ubuntu 24.04, follow these steps:
Step 1 : Ensure your system is up-to-date by running:

Step 2 : If OpenSSL is not already installed, install it by running:

Step 3 : Generate a self-signed SSL certificate and private key:
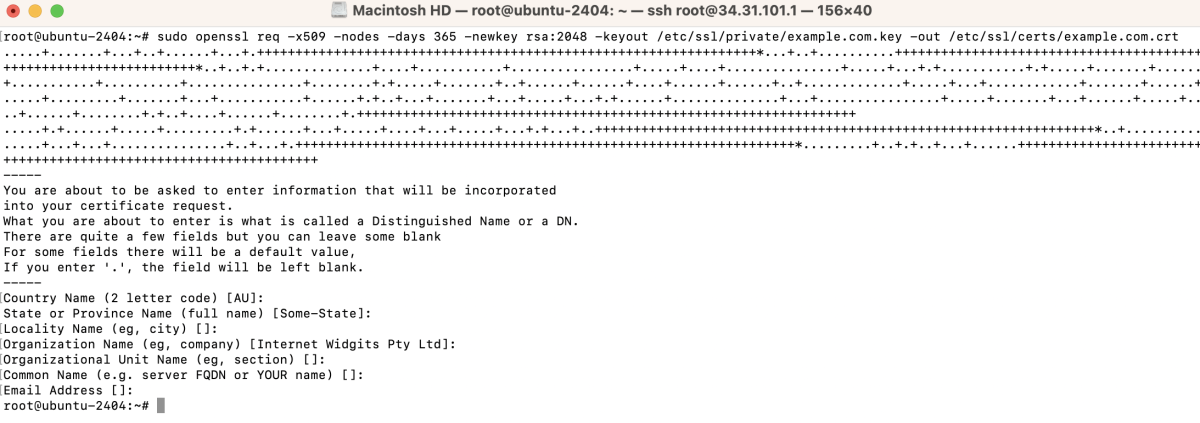
Follow the prompts to provide the necessary information.
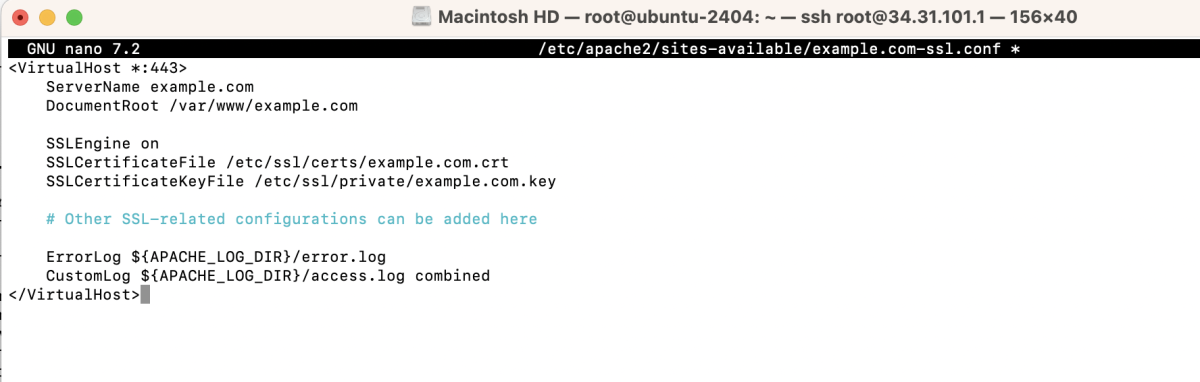
Step 4 : Create a new Apache SSL configuration file:
Add the following content, replacing example.com with your domain name:
Step 5 : Enable the SSL module for Apache:

Step 6 : Enable the SSL configuration file you created:

Step 7 : Test the Apache configuration for syntax errors:

Step 8 : If the configuration test is successful, restart Apache:

Step 9 : Open a web browser and navigate to your domain using https://example.com. Ignore any warning about the self-signed certificate.
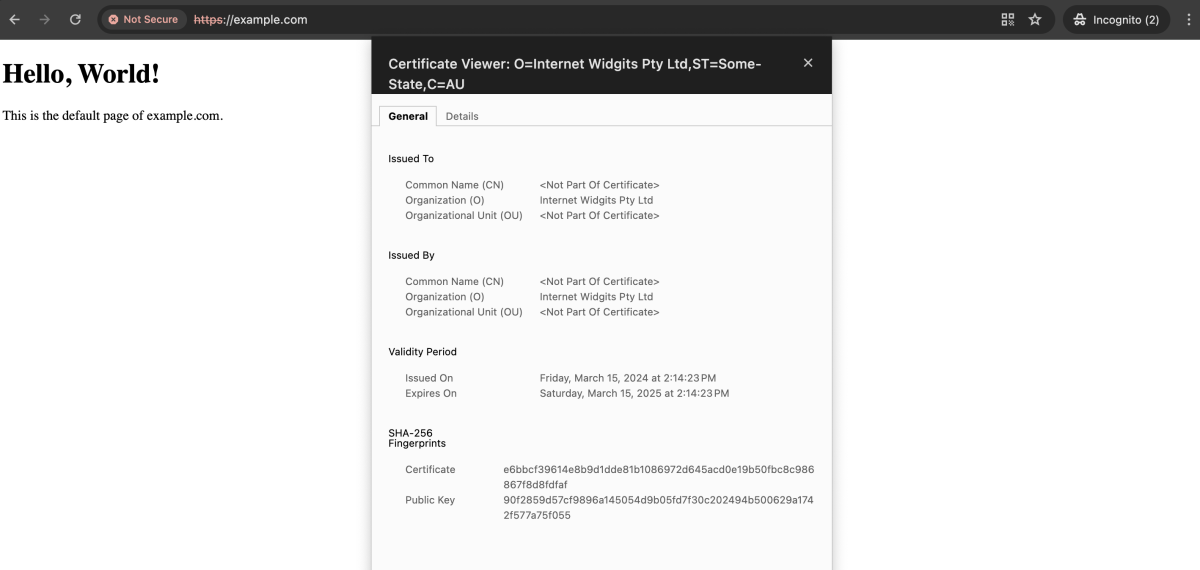
Congratulations! You have successfully configured SSL for Apache on Ubuntu 24.04.