Google Compute Engine can be used to set up a secure Linux VM via the Cloud Console. From there, it’s relatively easy to launch startup scripts designed to automate NGINX installations. It’s helpful for when you want to create more VMs but don’t have the time to configure the settings manually.
Once you have one Virtual Machine set up, you can use it as a model for creating more and speed up the process significantly.
Step 1 - Launch Google Cloud Console and log in.
Step 2 - Select Compute on the primary menu. Then, select Compute Engine.
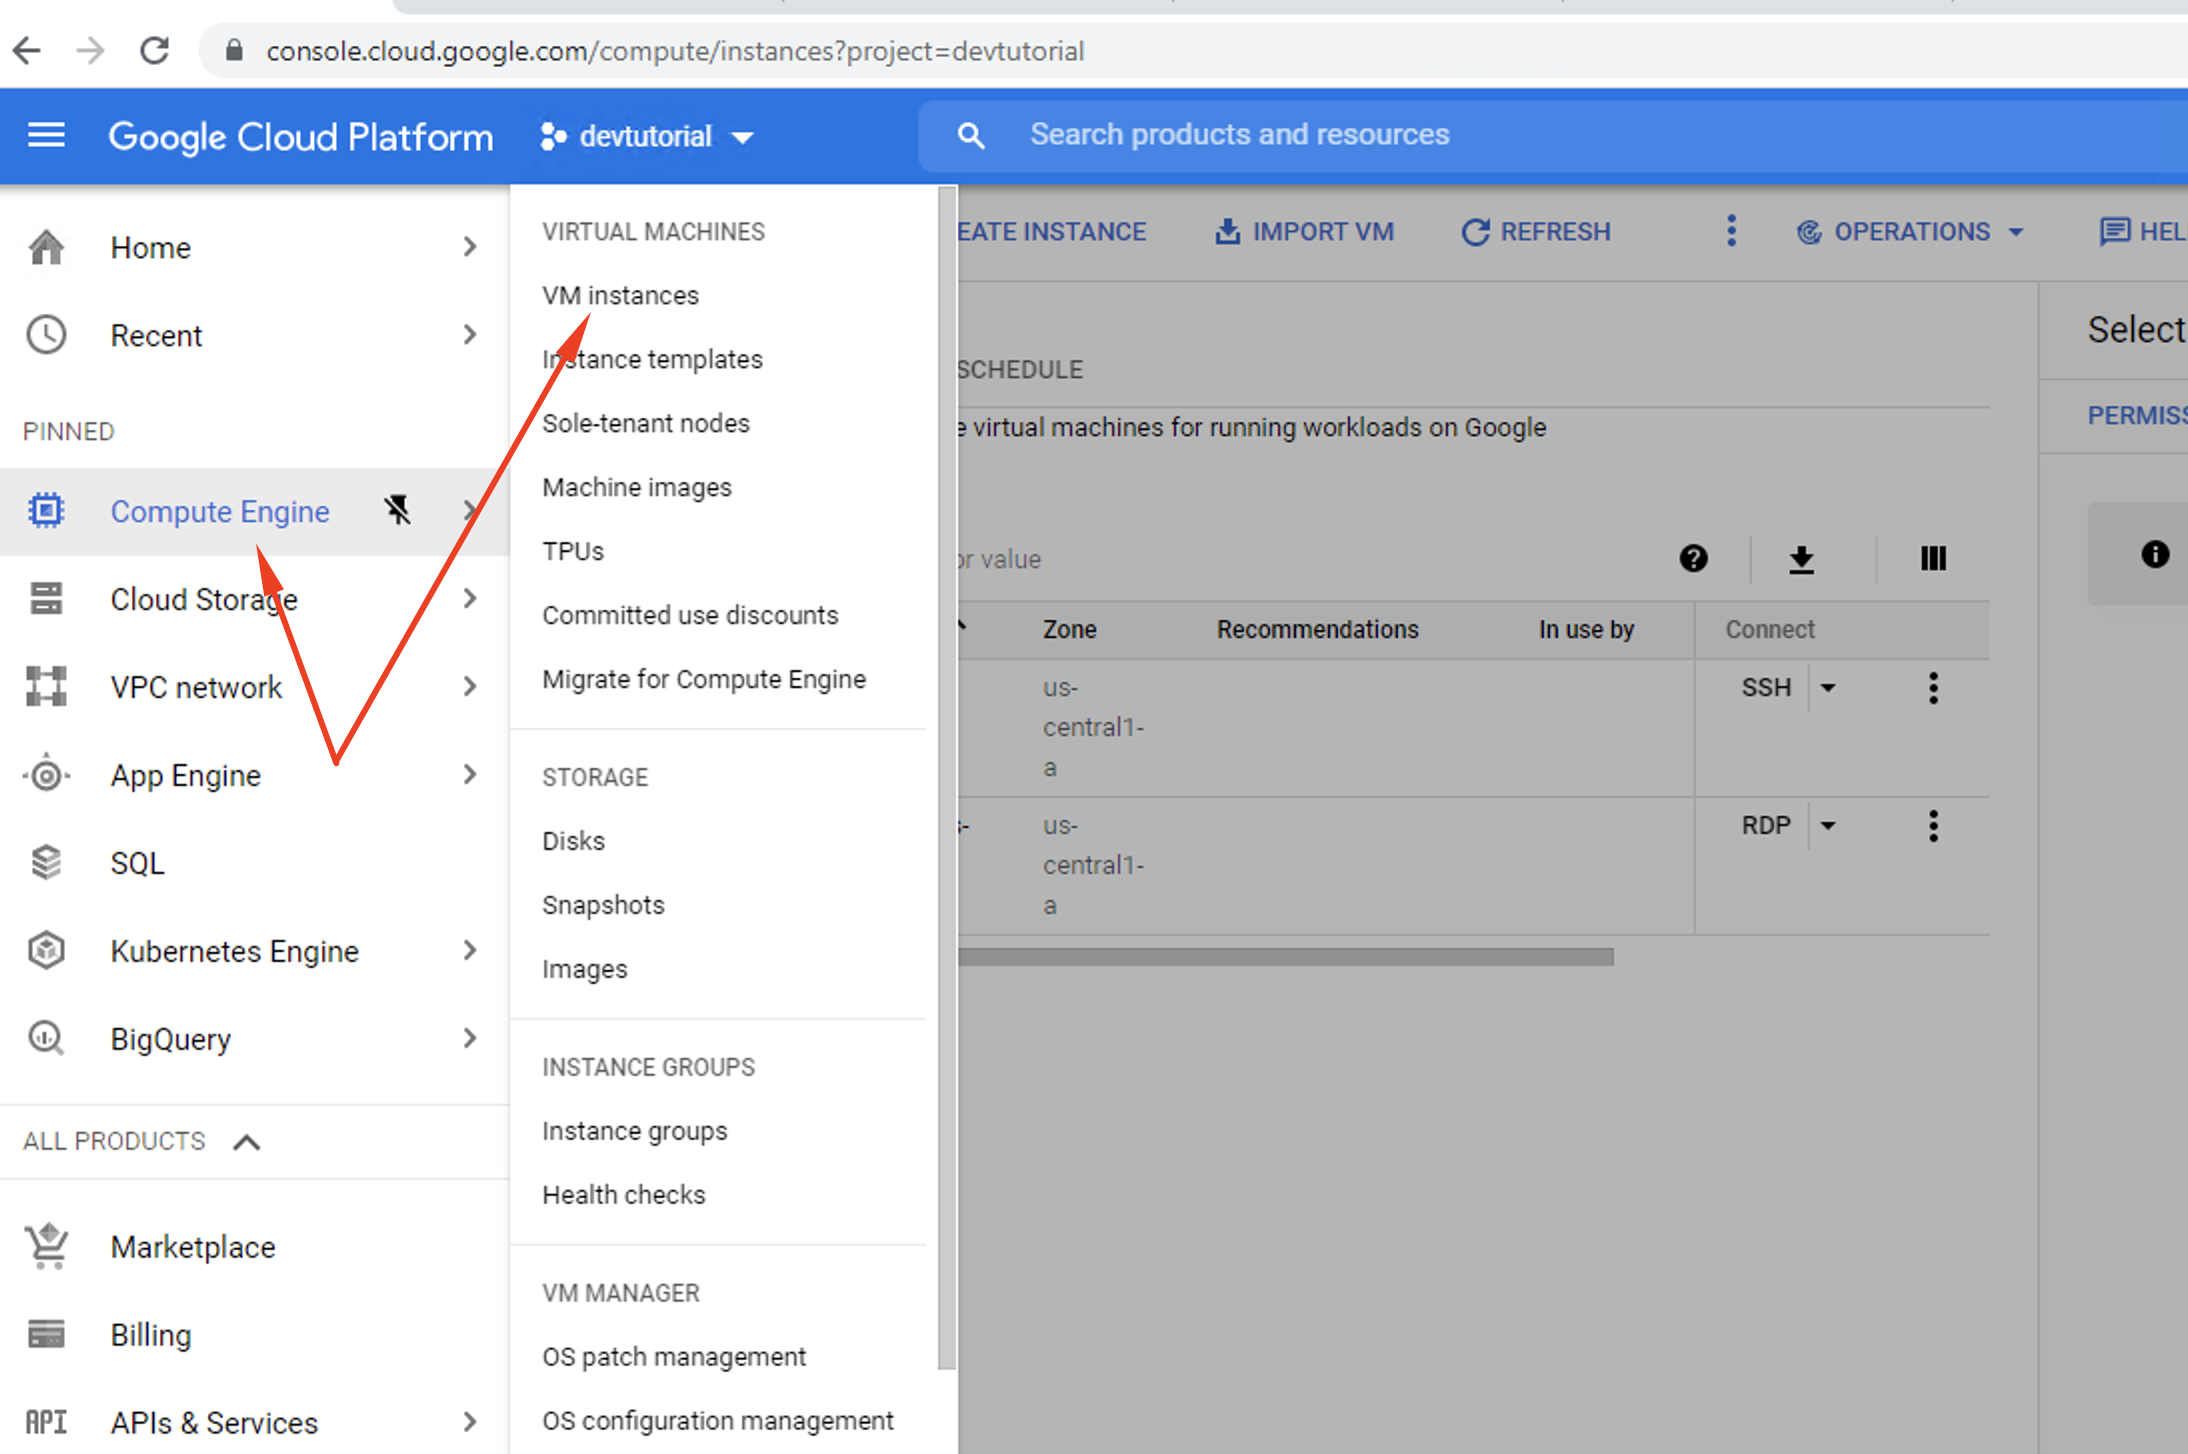
Step 3 - In the next menu, find and click the option VM instances. Select Create.
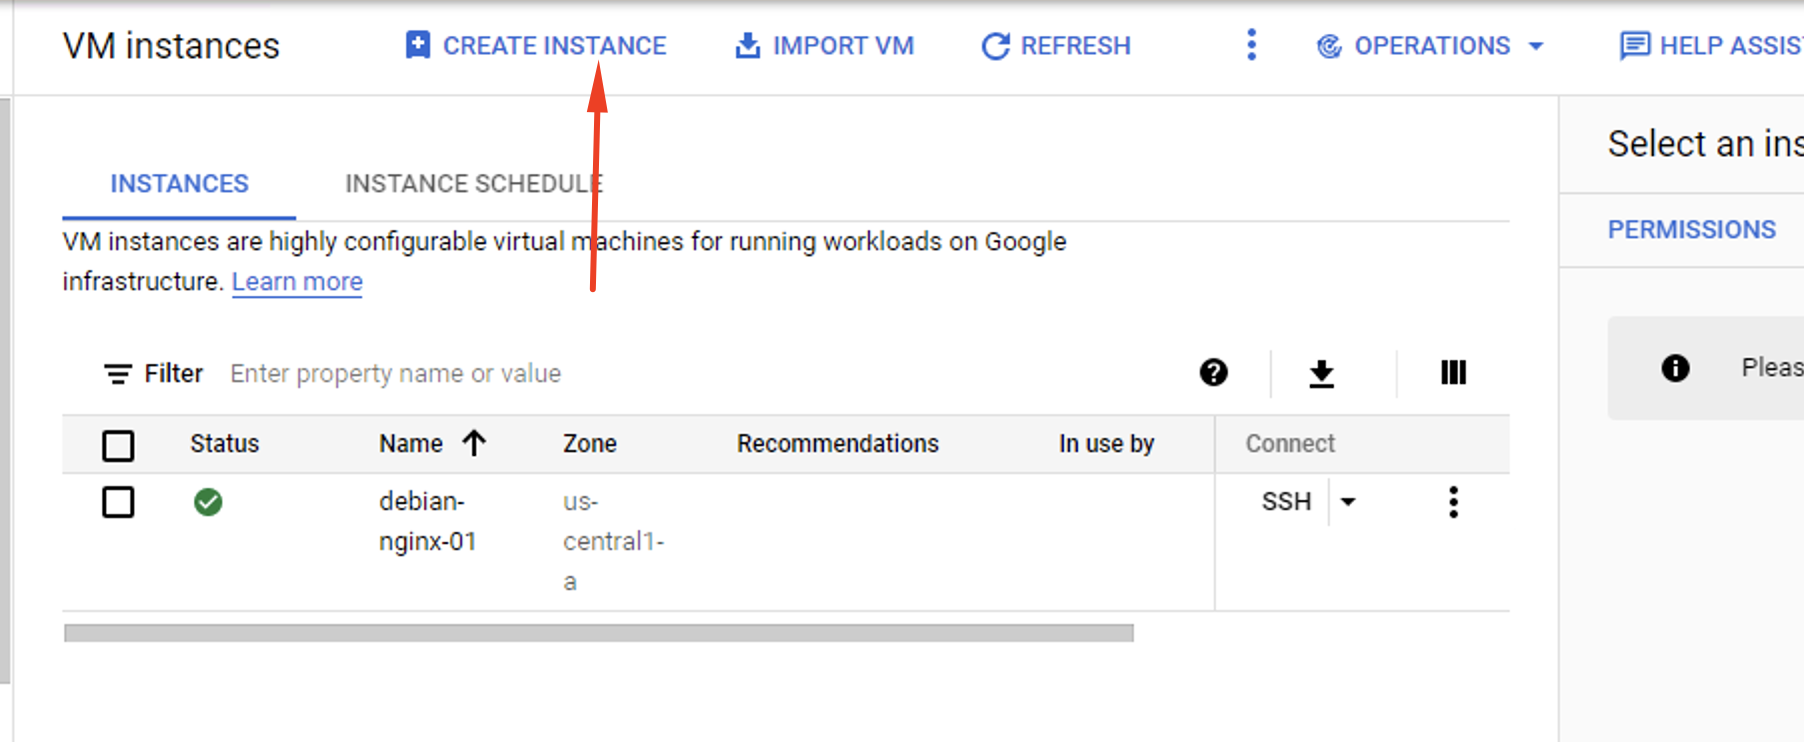
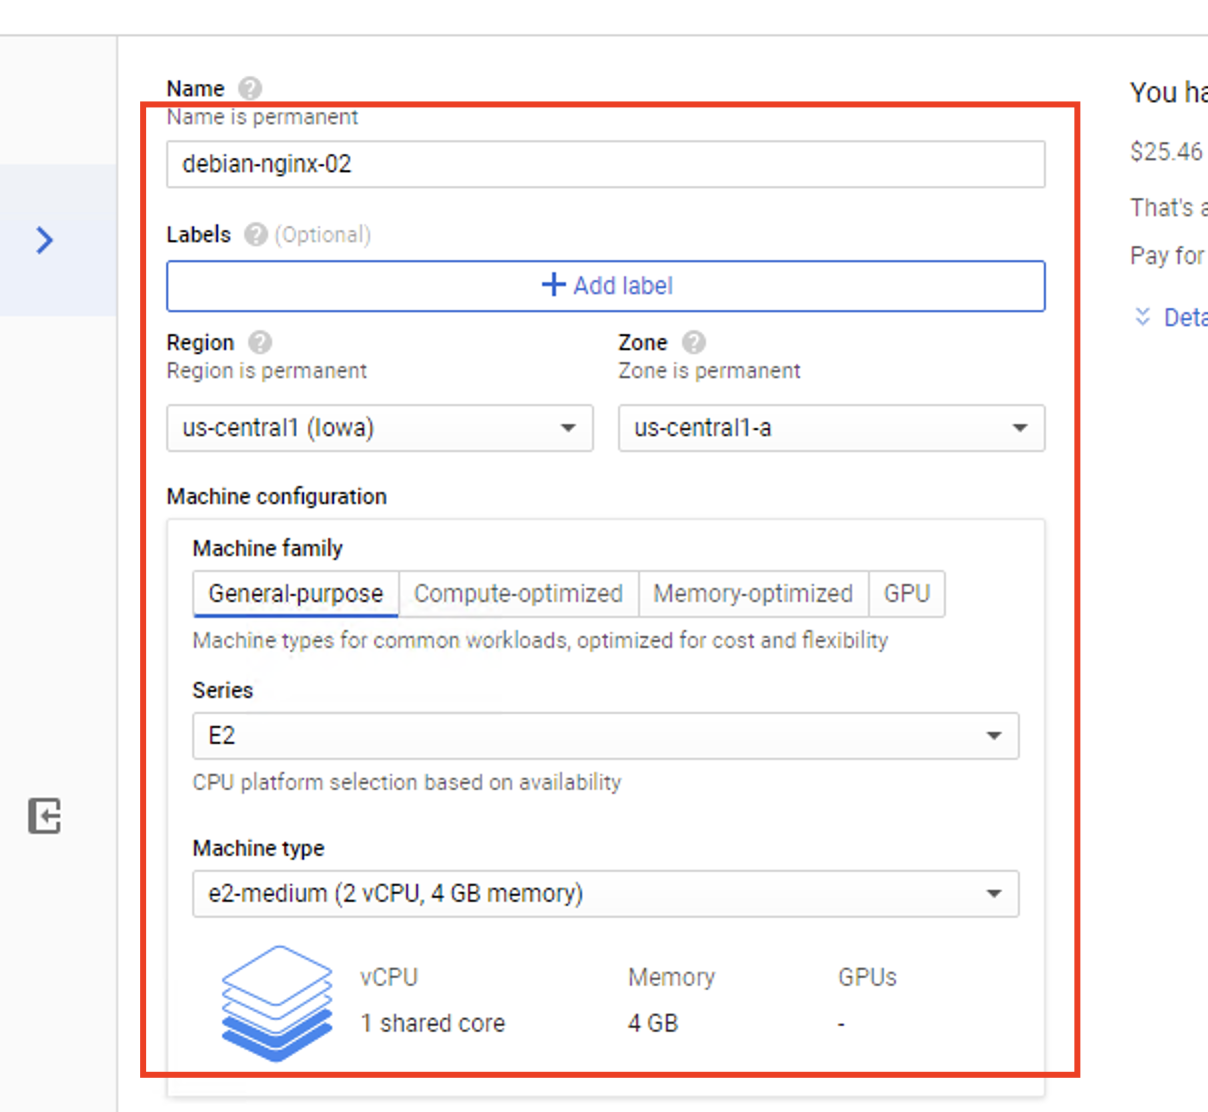
Step 4 - Pick a name for your Virtual Machine. It can be anything you like.
Step 5 - Select a Region and Zone for your Virtual Machine.
Step 6 - Browse the VM configuration options and pick one which suits your requirements. Or create a custom configuration if you know how.
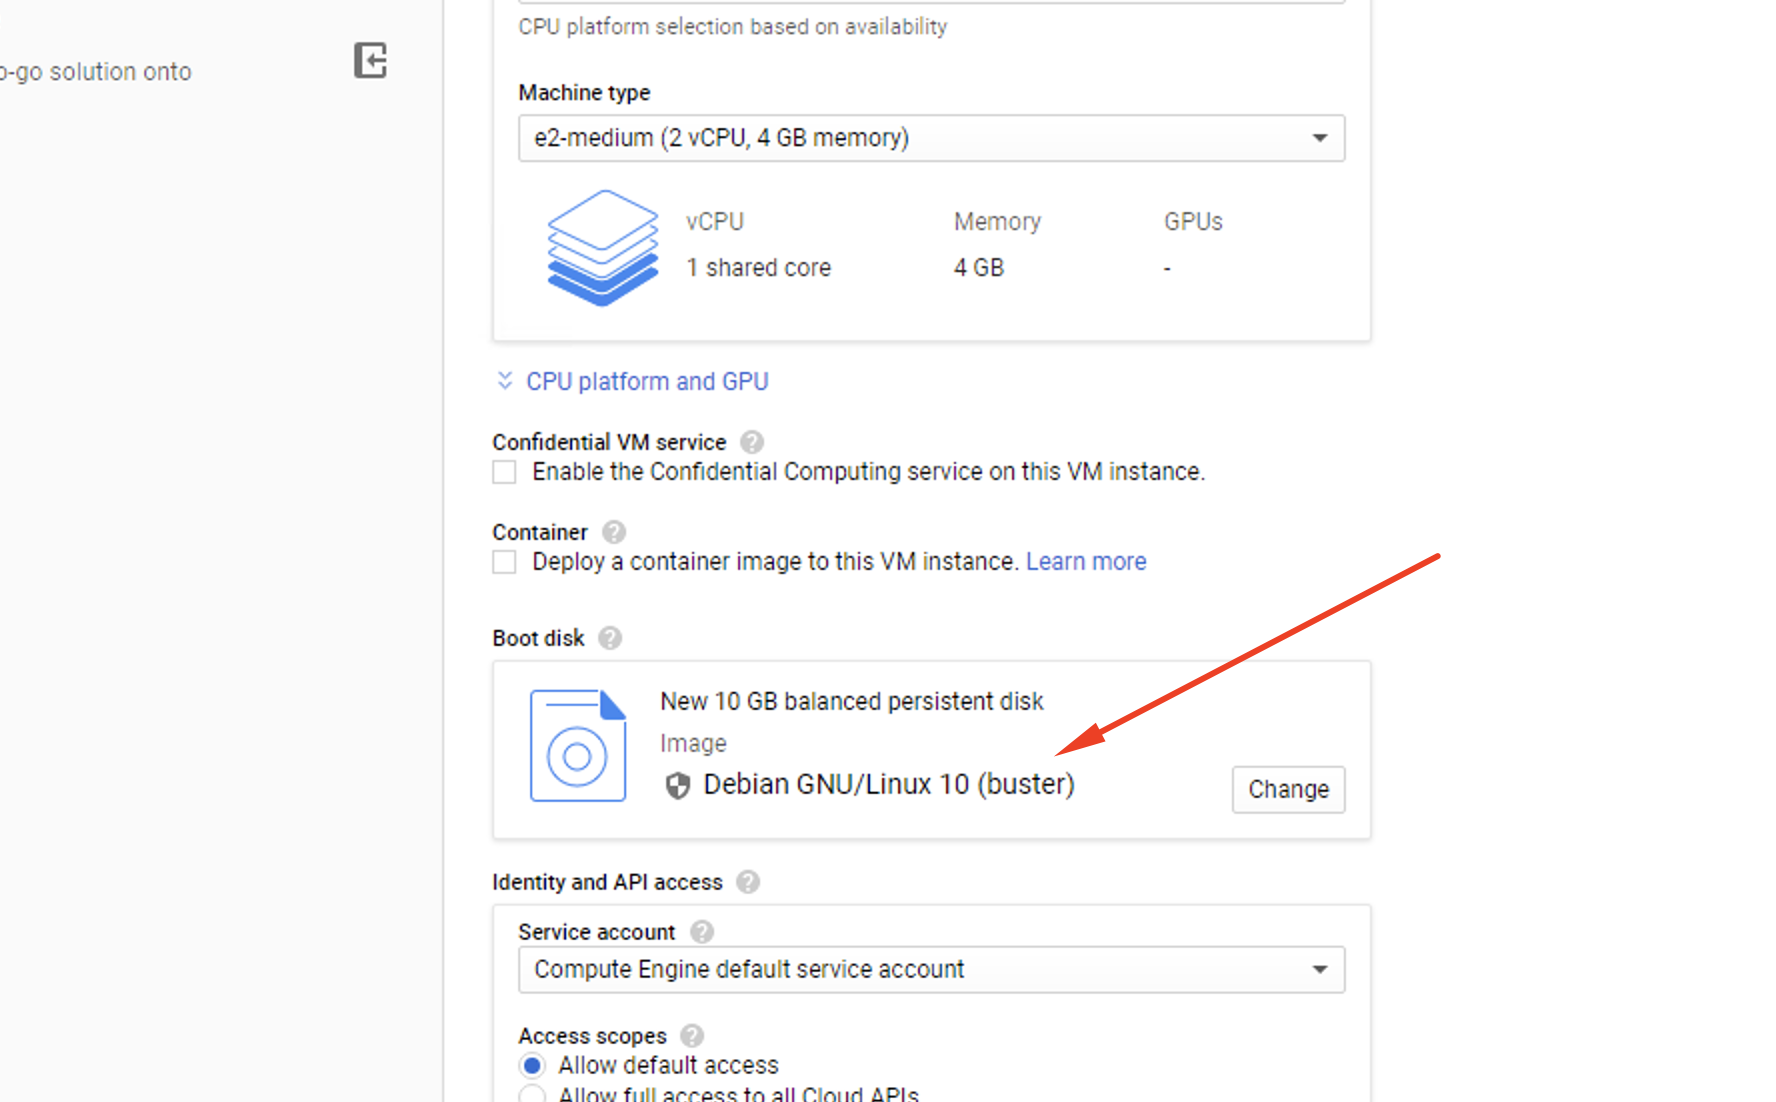
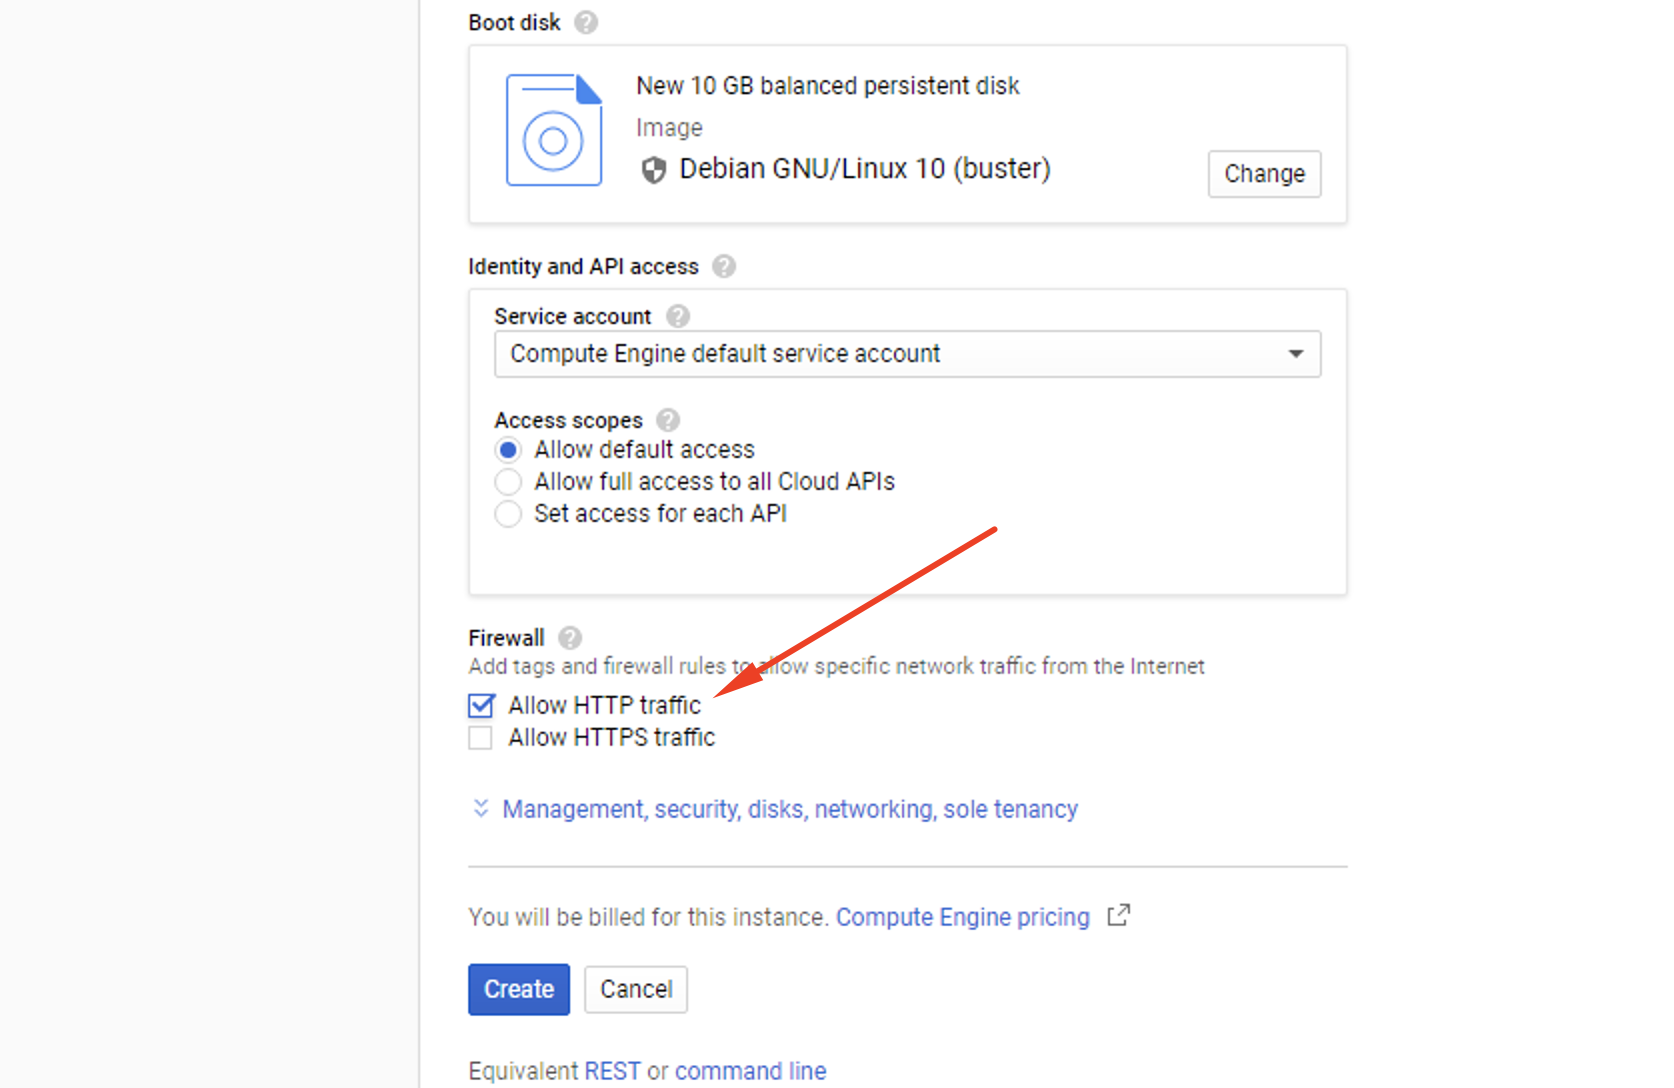
Step 7 - Set the boot disk configuration to Debian GNU/Linux 10 (buster) if it isn’t already.
Step 8 - Check the box that says Allow HTTP traffic to the instance.
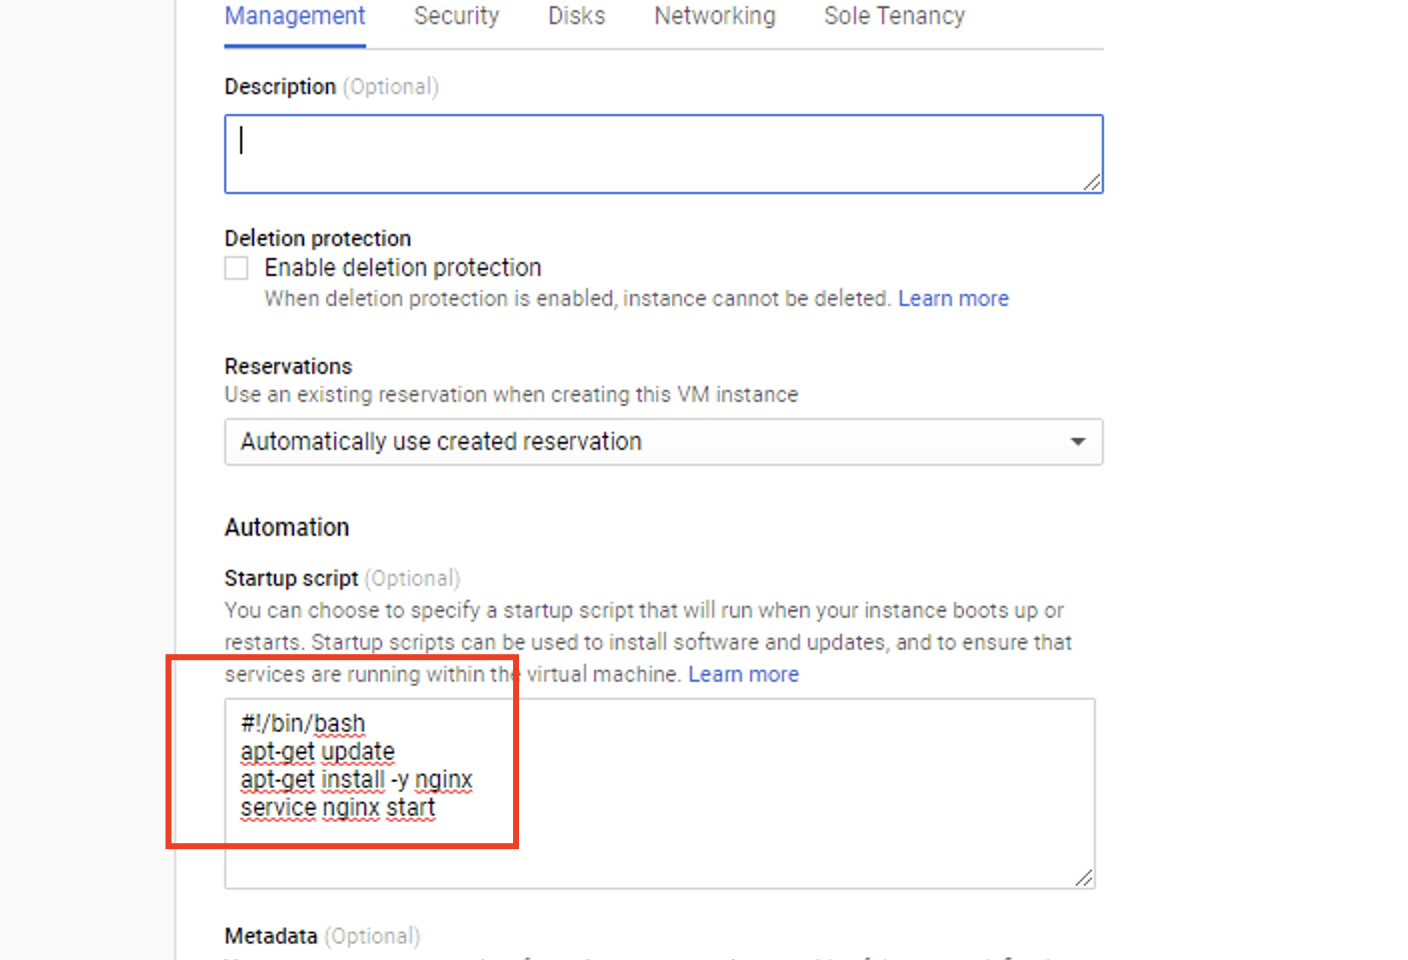
Step 9 - Navigate to the Startup’s script input window and type the following as it appears here:
Step 10 - Hit the Create button to launch the new VM. You may need to wait a few minutes.
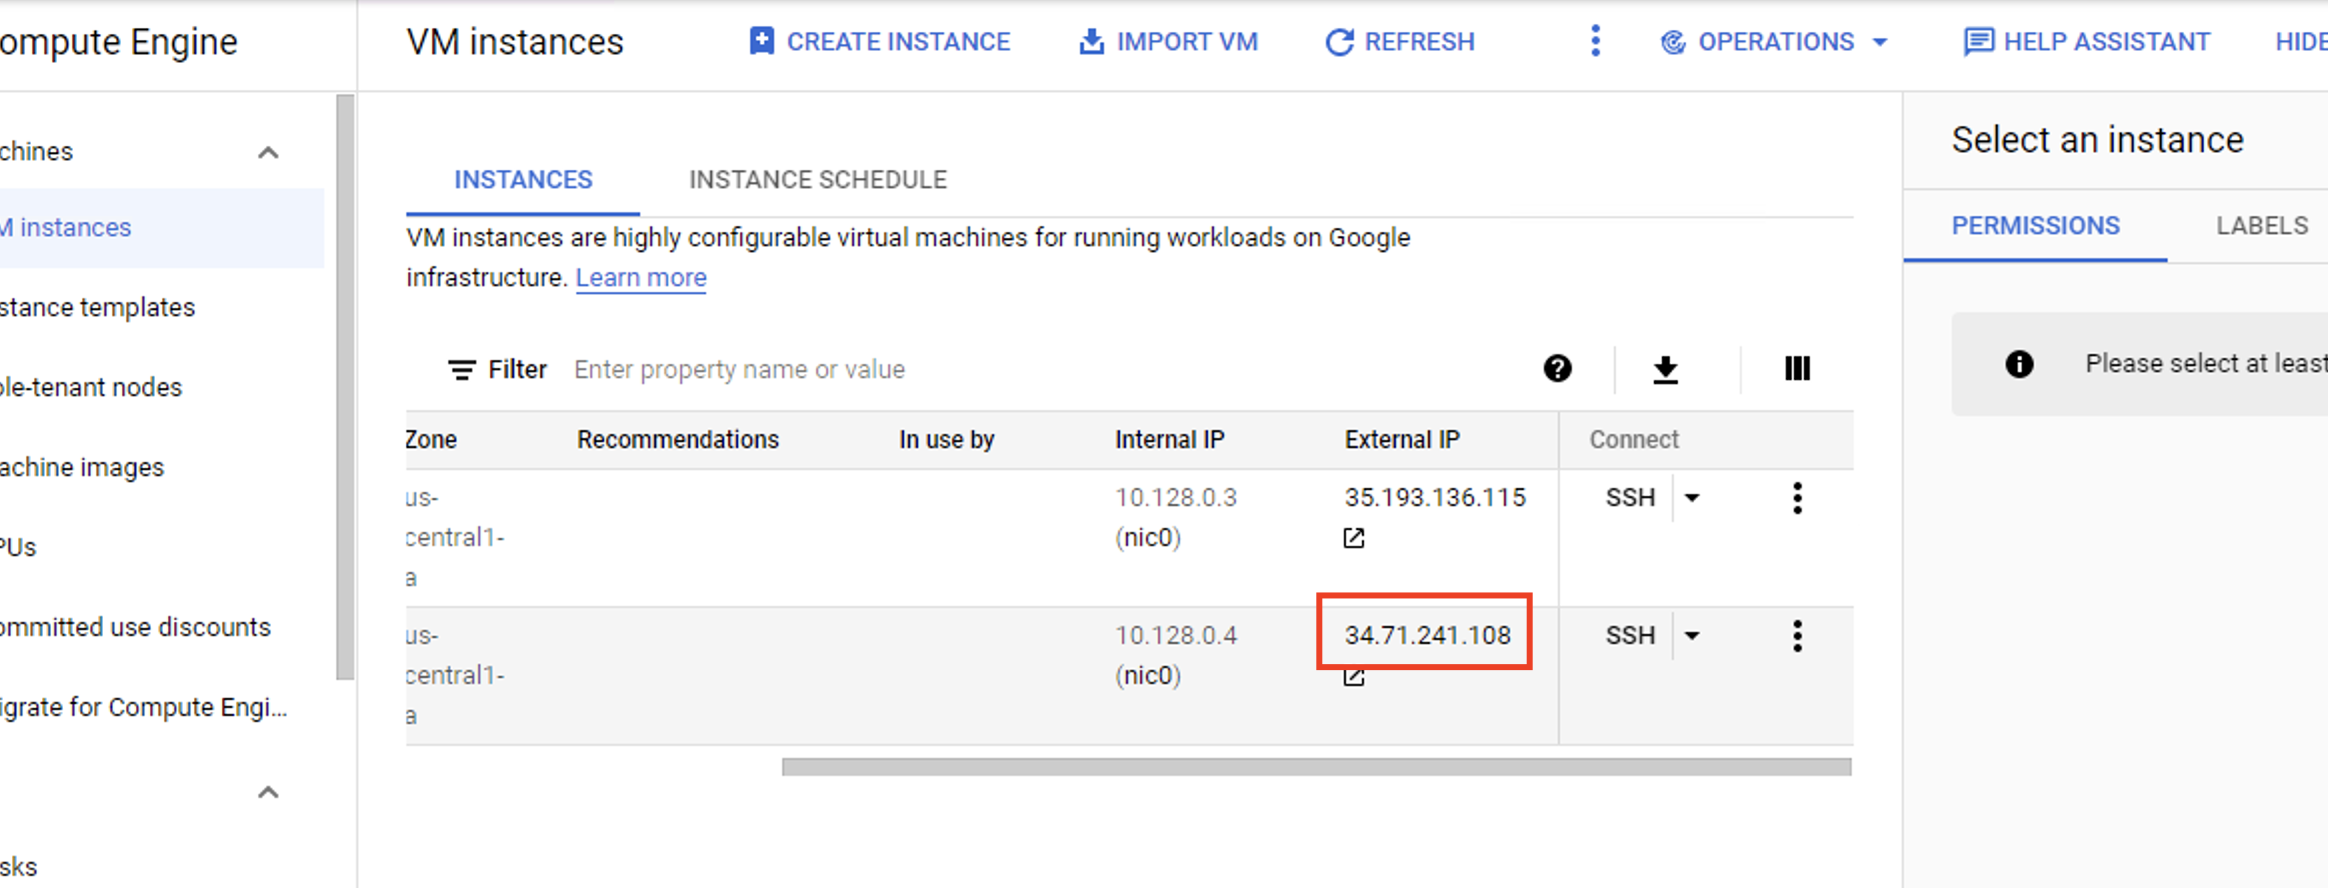
Step 11 - When the VM installation is complete, launch your web browser using the new IP address.

This process can be used to set up an automated launch or shutdown script for new Virtual Machines. Once established, you should be able to create multiple VMs by working through these steps just one time.