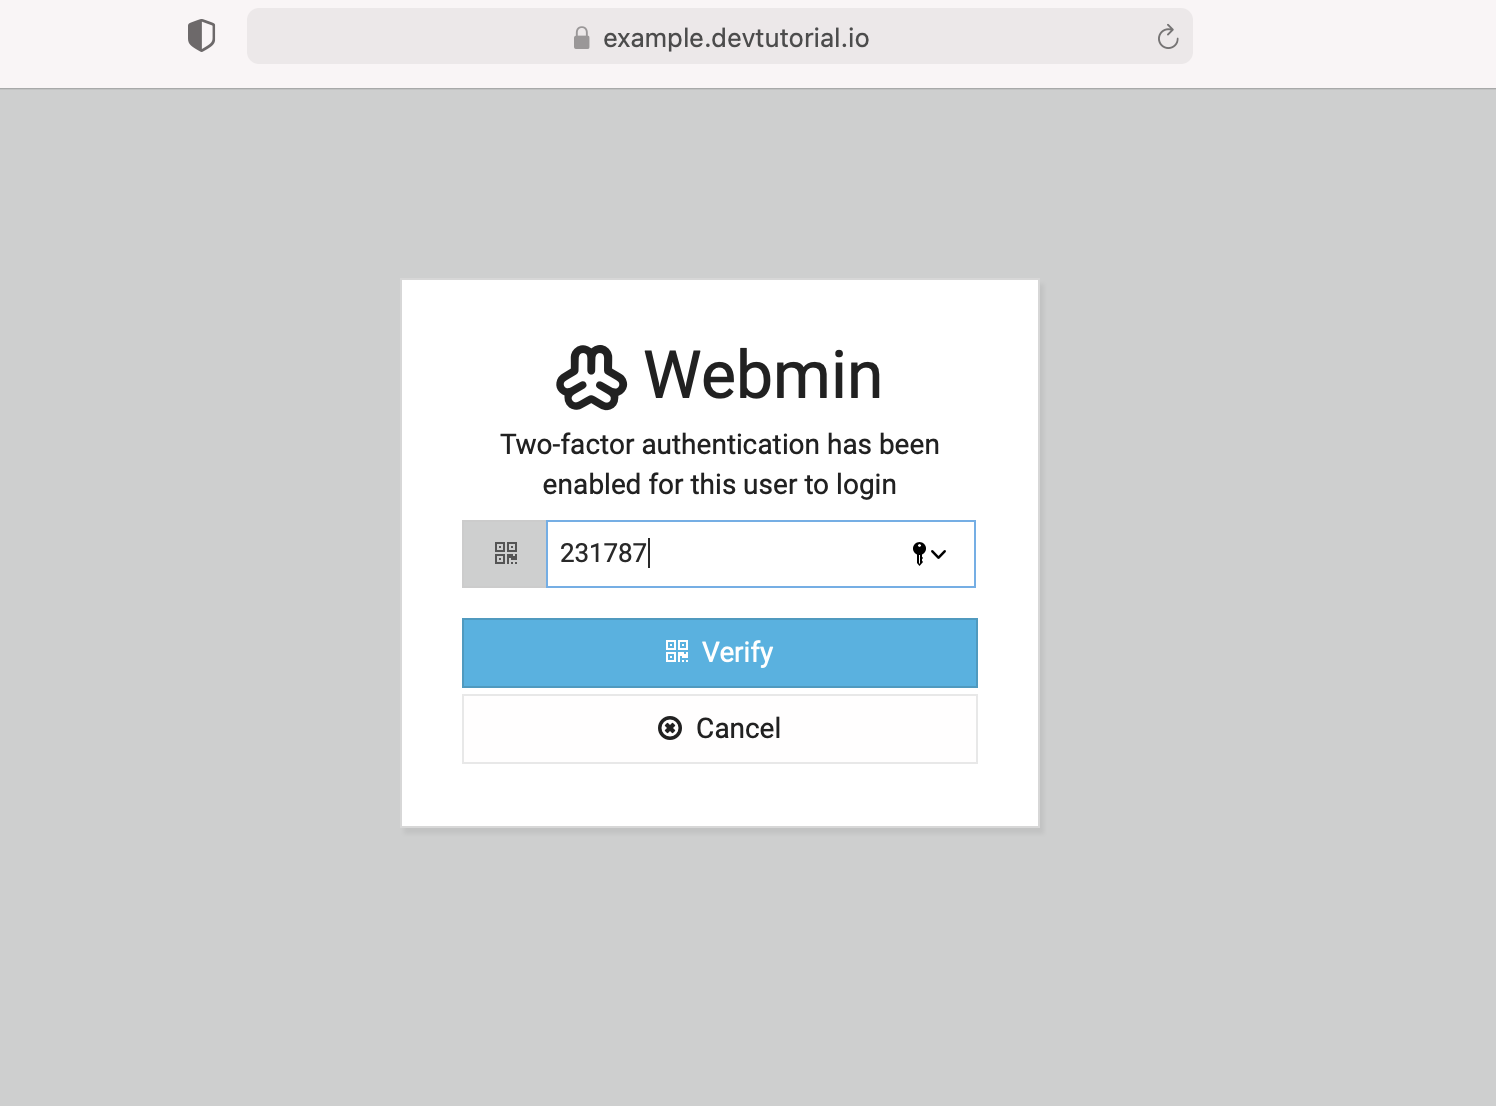
Webmin provides Google Authenticator Two-Factor Authentication tokens to generate and use. I highly recommend looking into this security measure for your server, as it will greatly increase overall protection. You will require the Google Authenticator application or a compatible authentication application to generate codes each time you'd like to log in. Enter your username and credentials, then follow by entering the generated code.
Enabling Two-Factor Authentication
Step 1 : Visit the Webmin menu and select "Webmin Configuration".
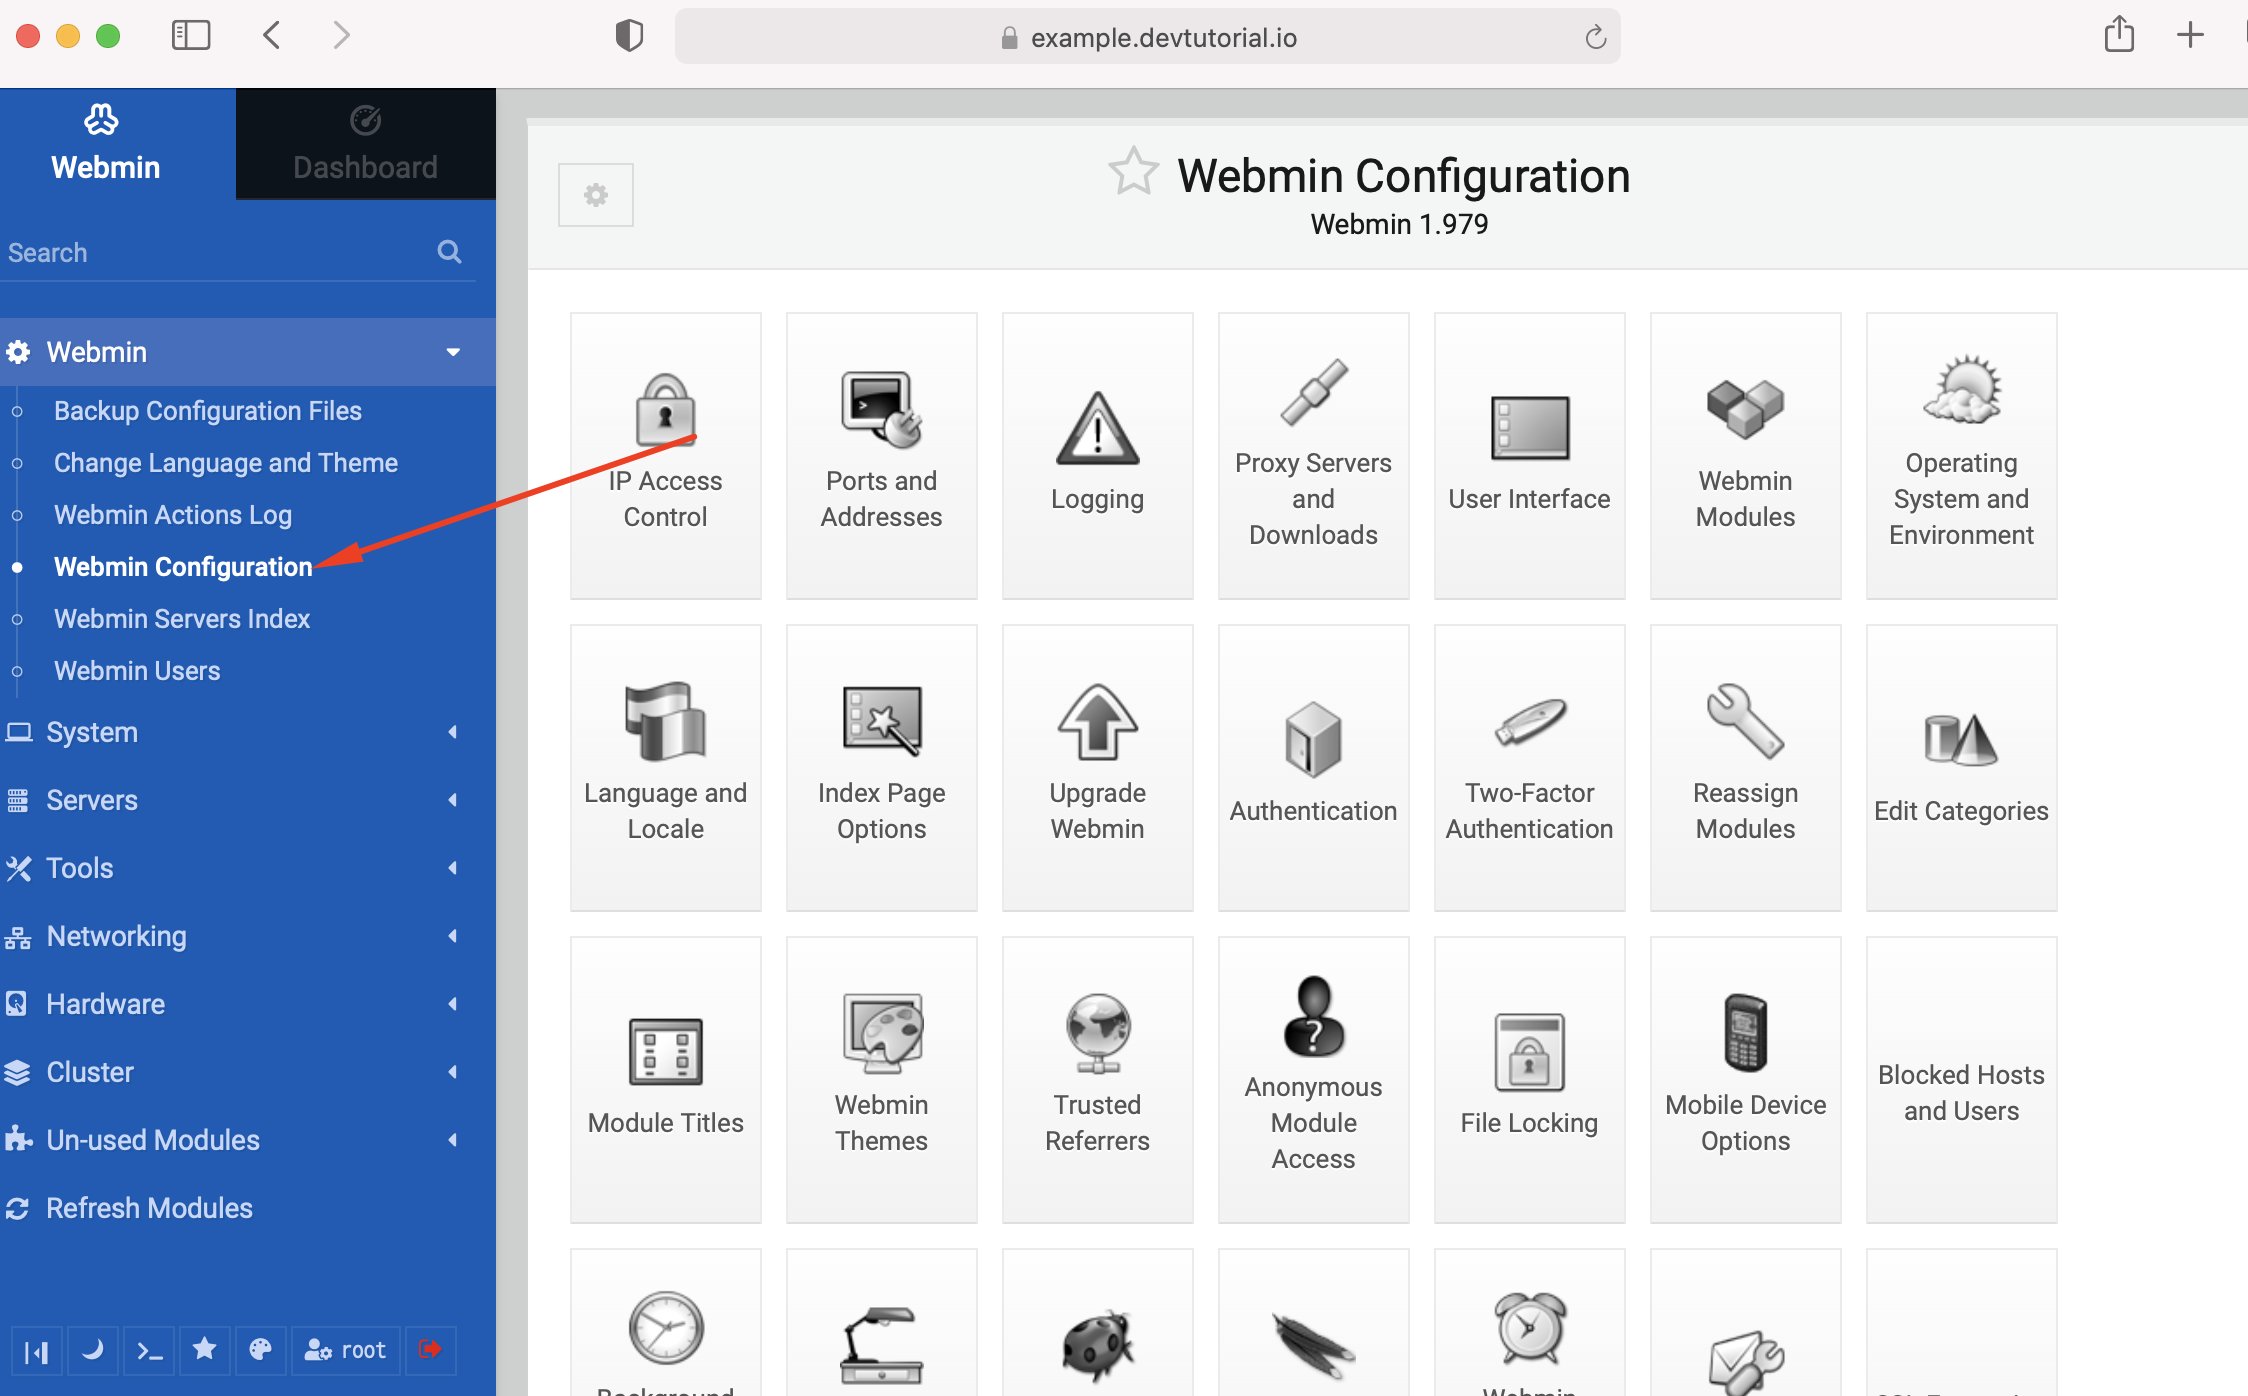
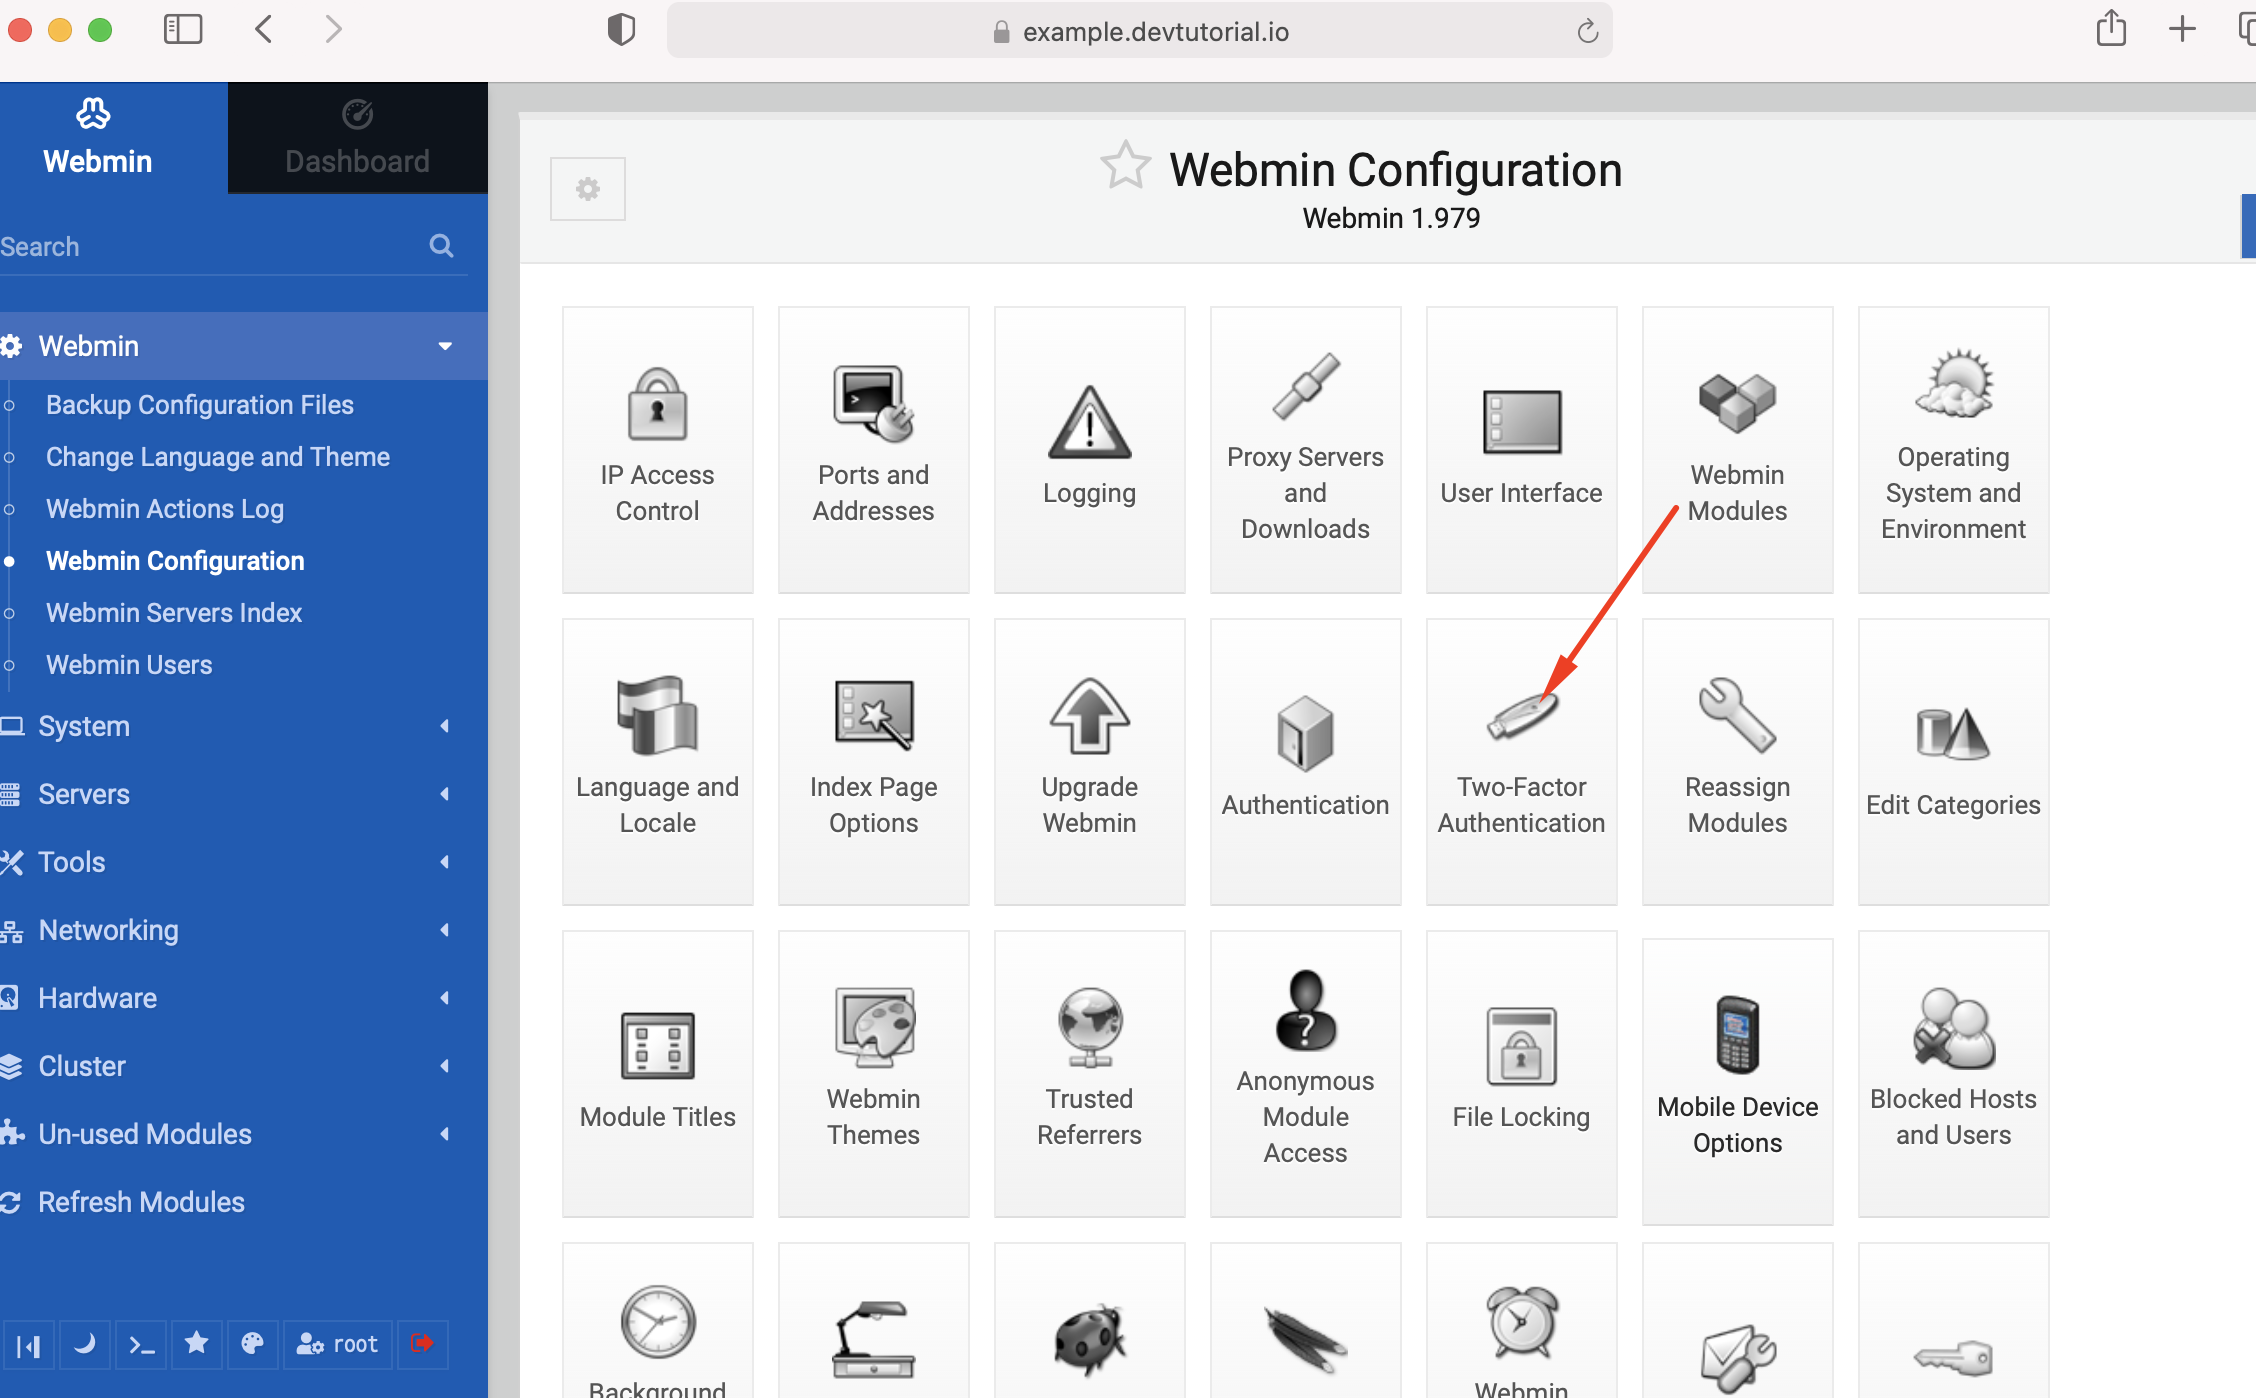
Step 2 : Go to "Two-Factor Authentication".
Step 3 : Select "Google Authenticator."
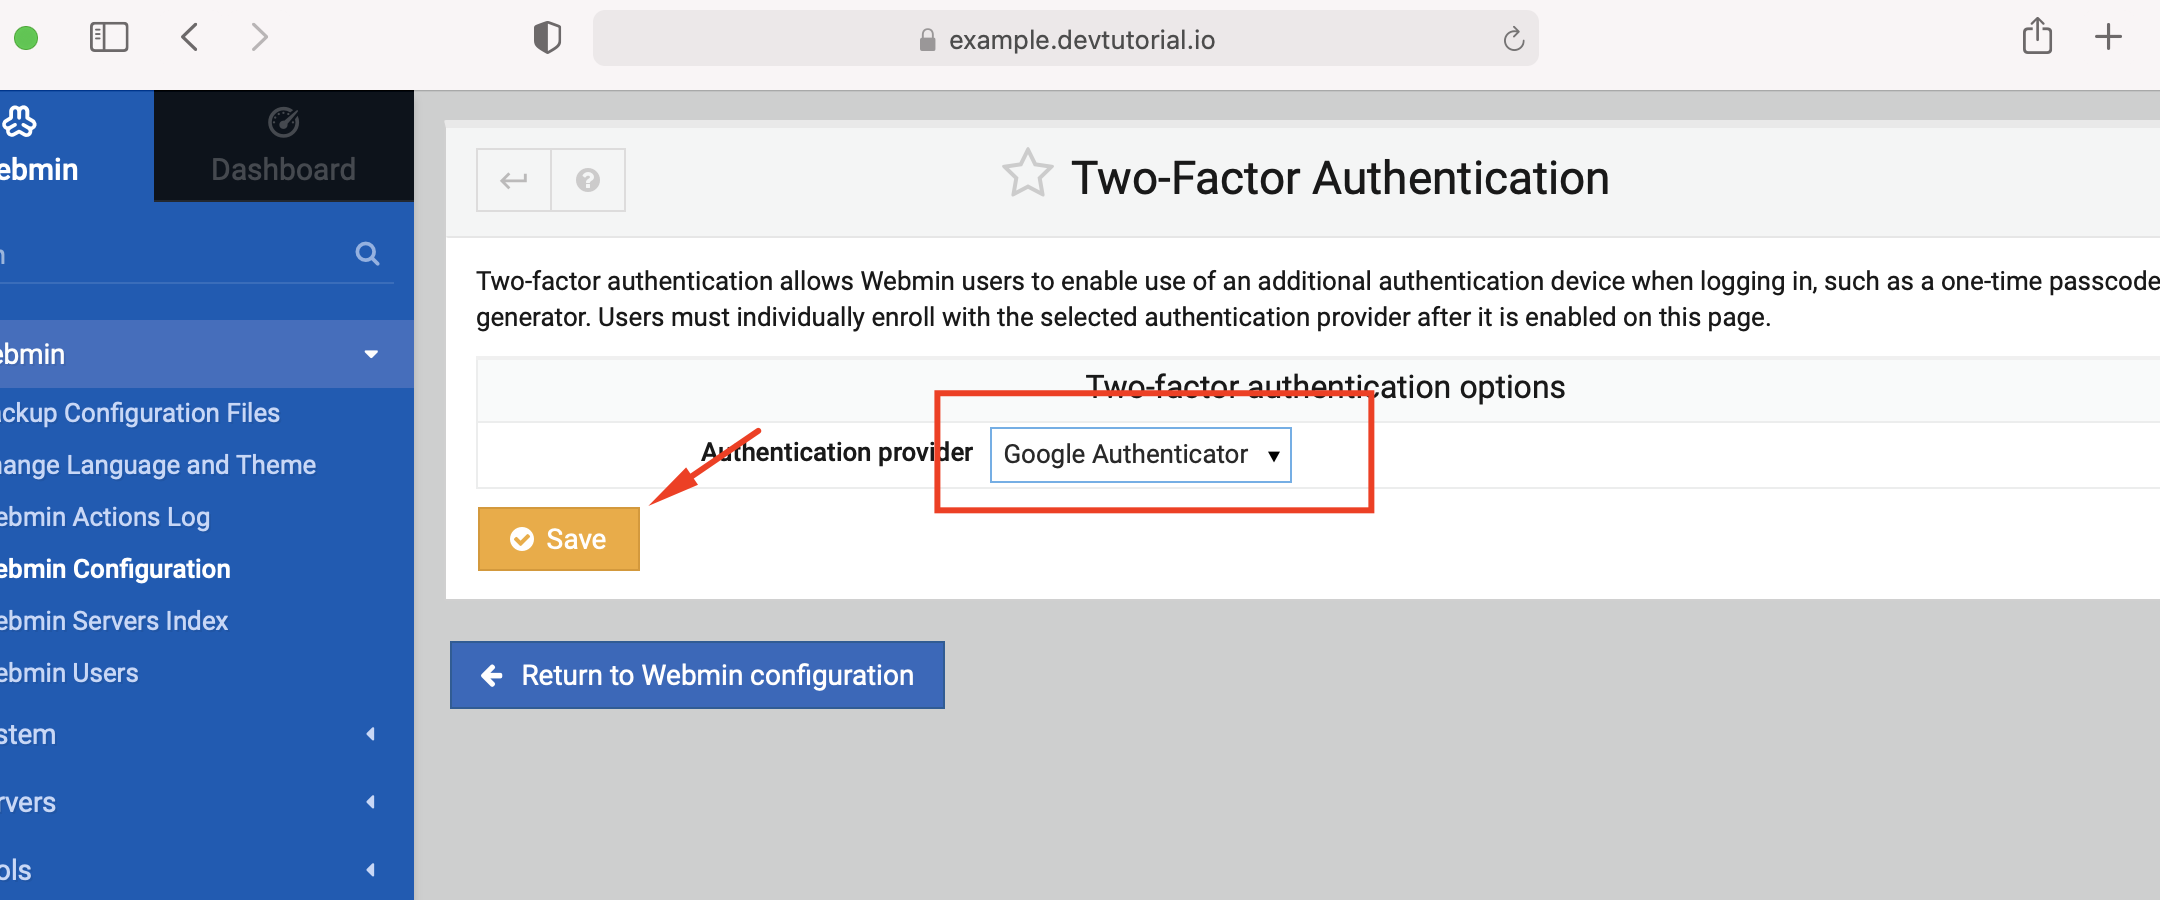
Step 4 : Click on "Save." Probably you will be told that "The Perl module Authen::OATH needed for two-factor authentication is not installed. Use the Perl Modules page in Webmin to install it".
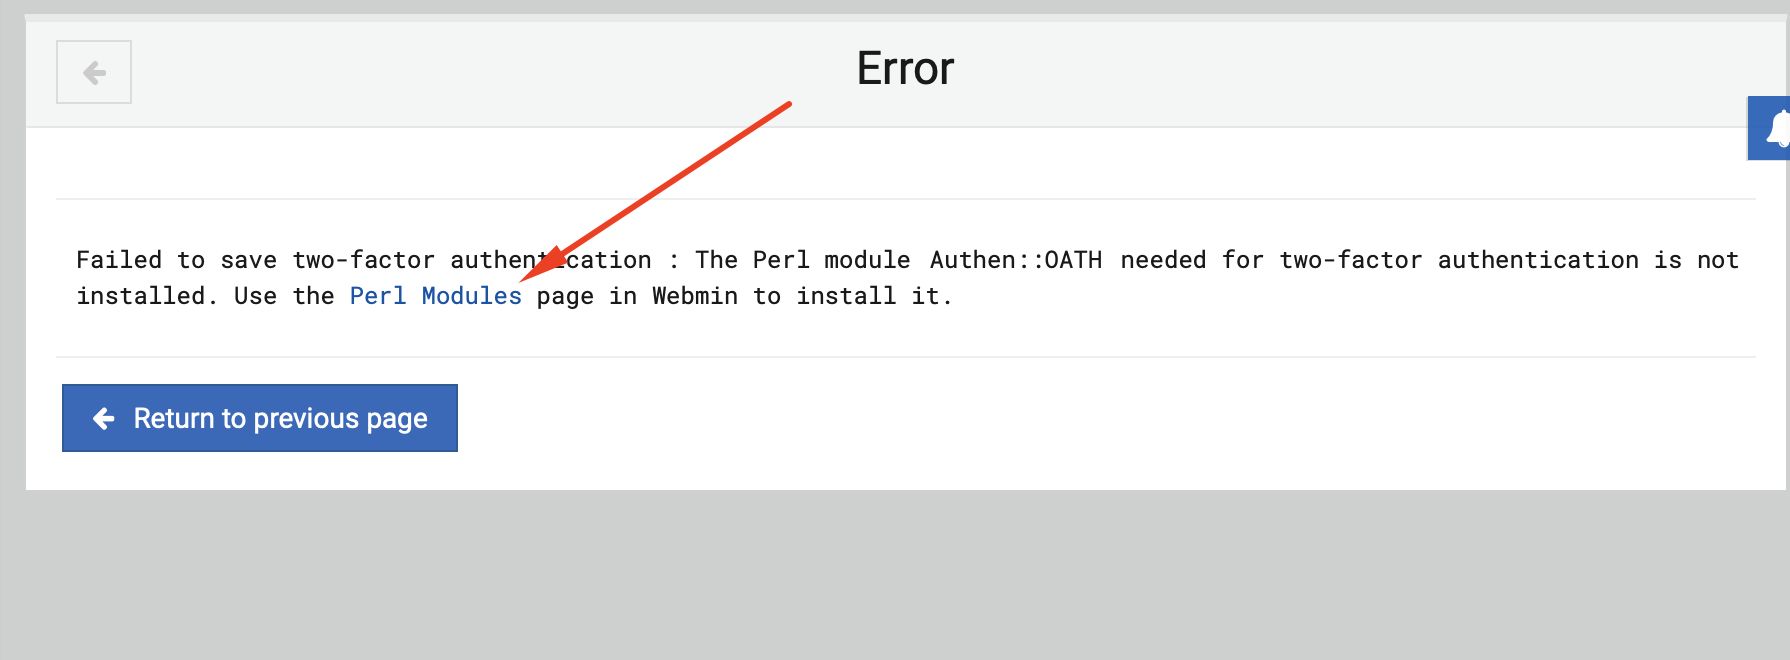
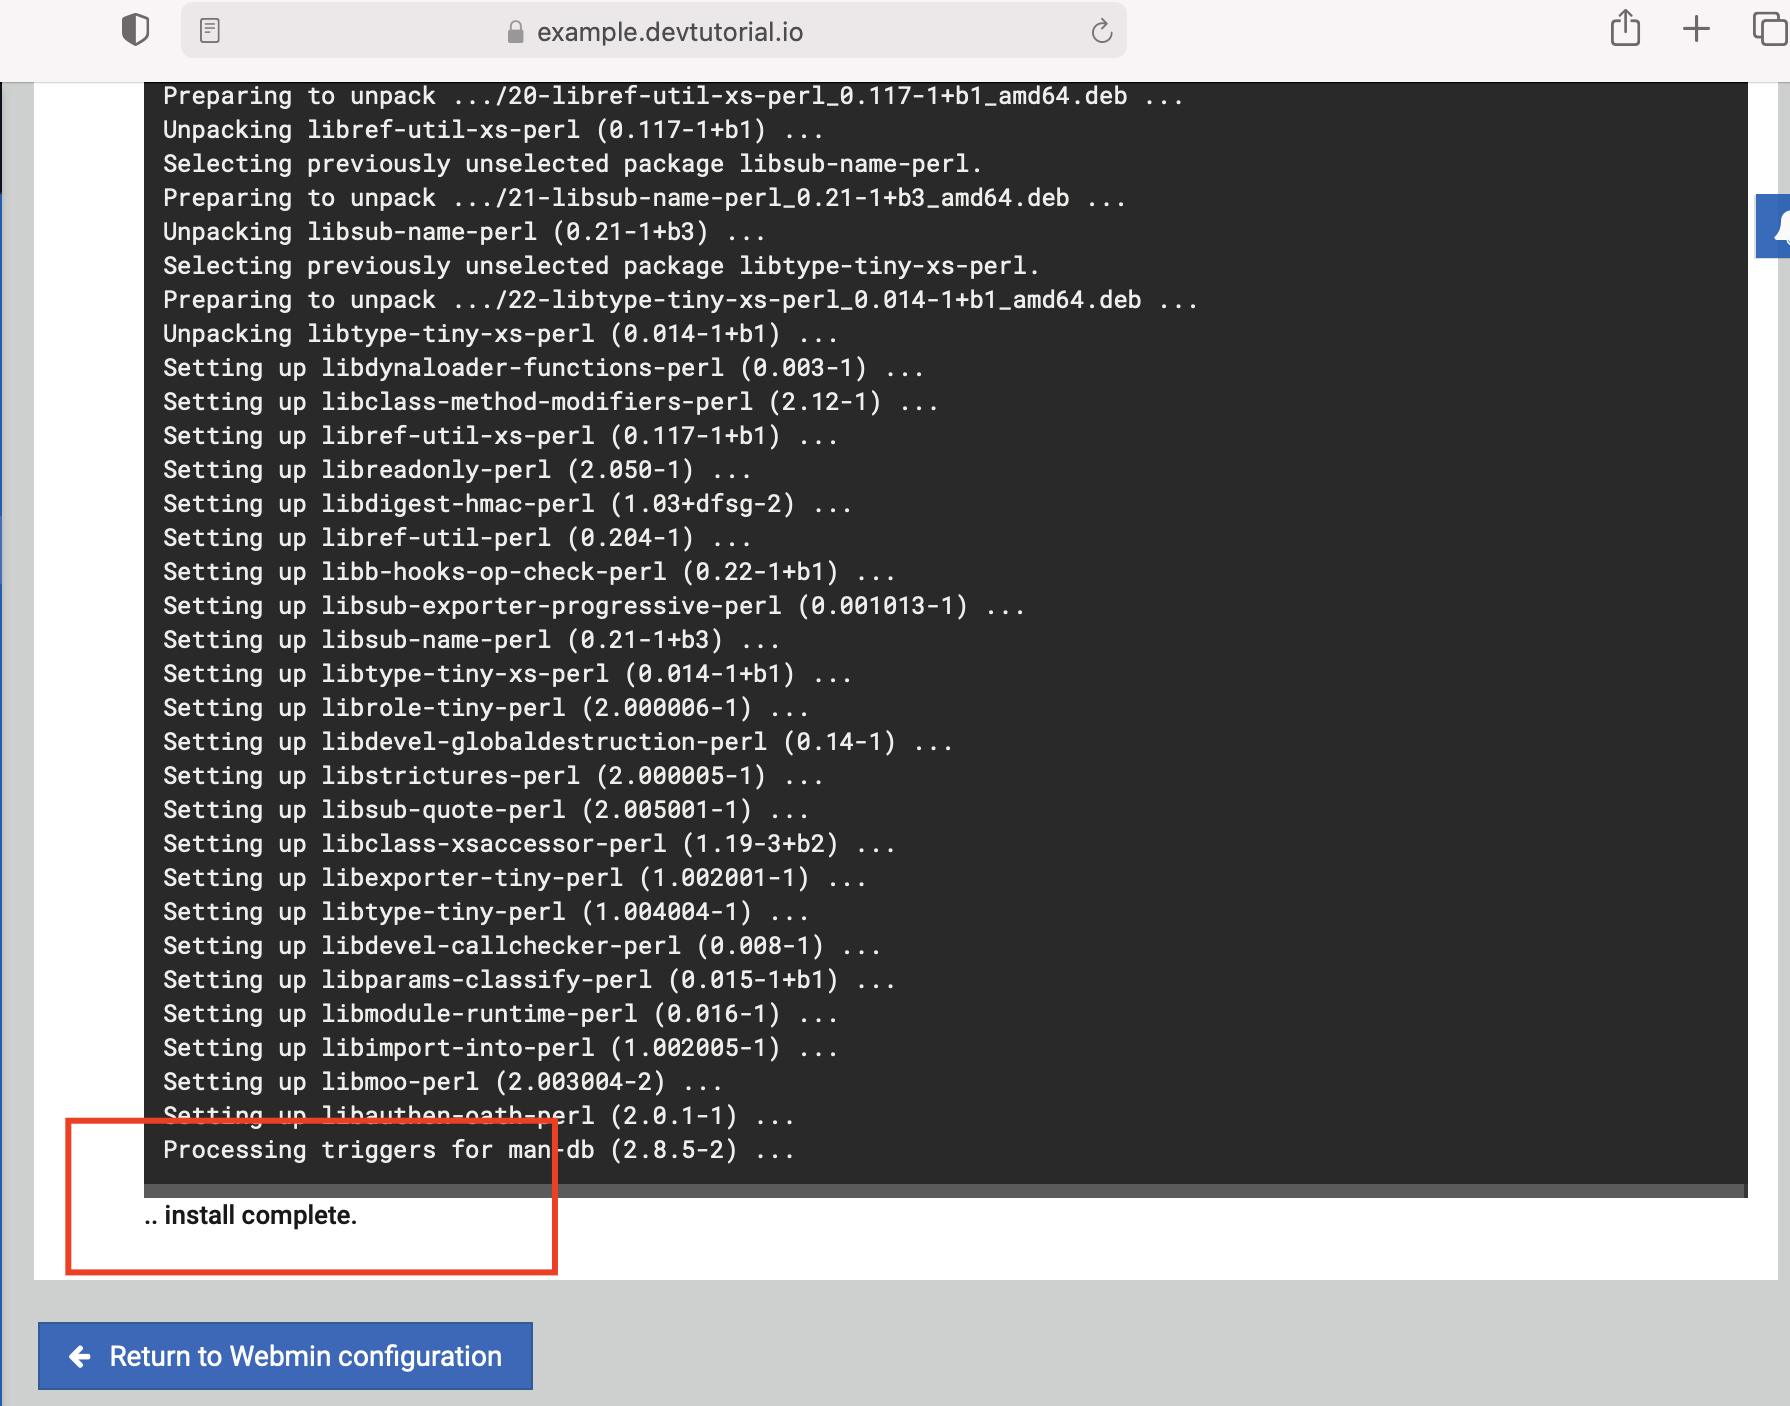
Step 5 : Go ahead and select on the "Perl Modules" link and let it install automatically. Installing on Debian should be fairly easy, while you may need to install multiple modules for CentOS installation.
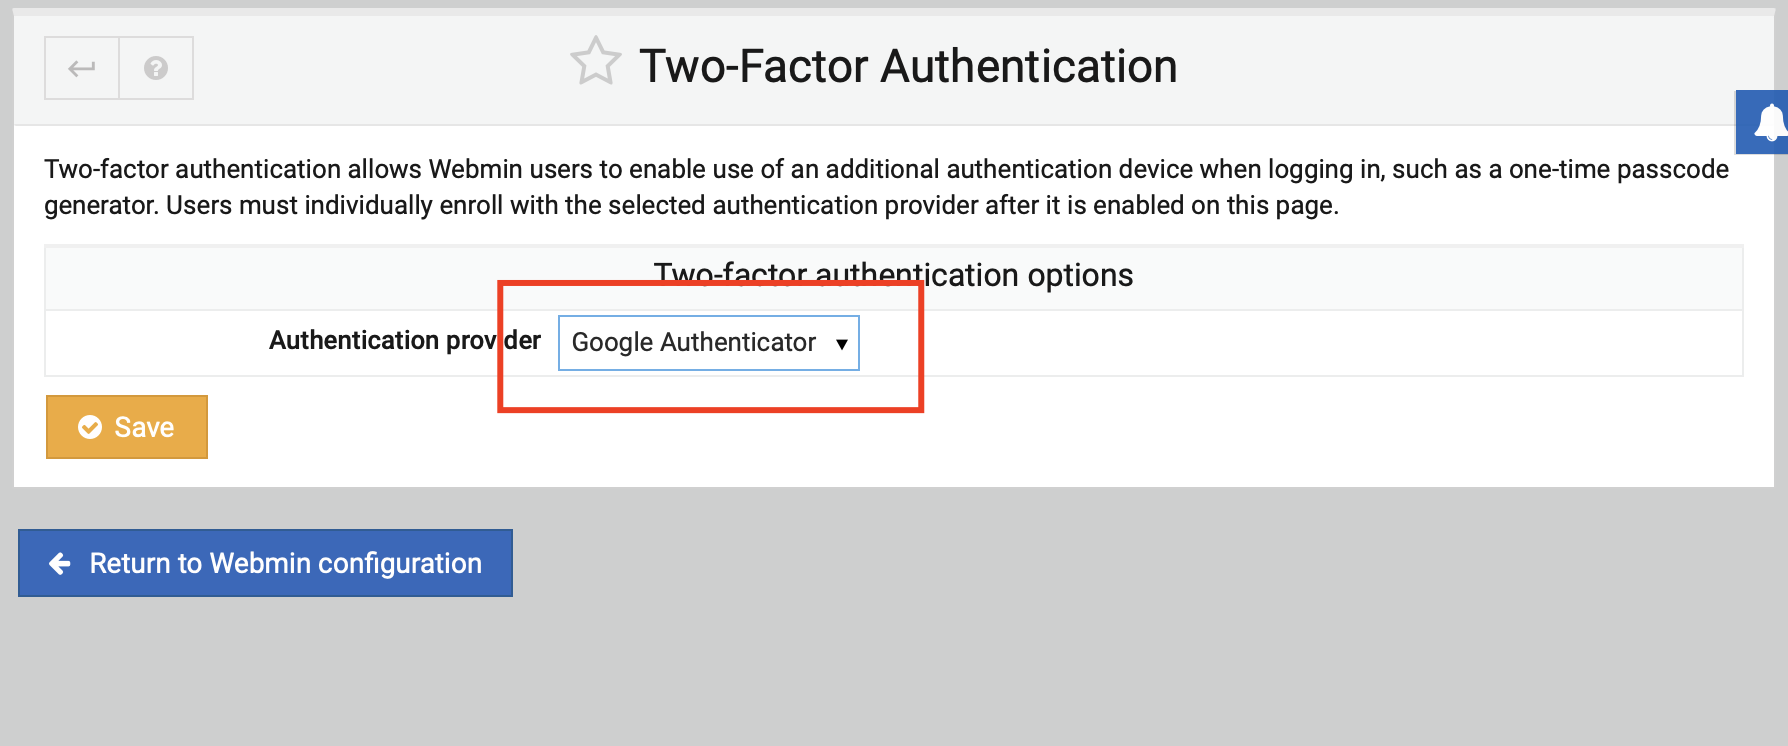
Step 6 : In order to add on Google Authenticator as an extra layer of security, go back to the two-step verification screen and select "Google Authenticator." Select "save" after it's been selected.

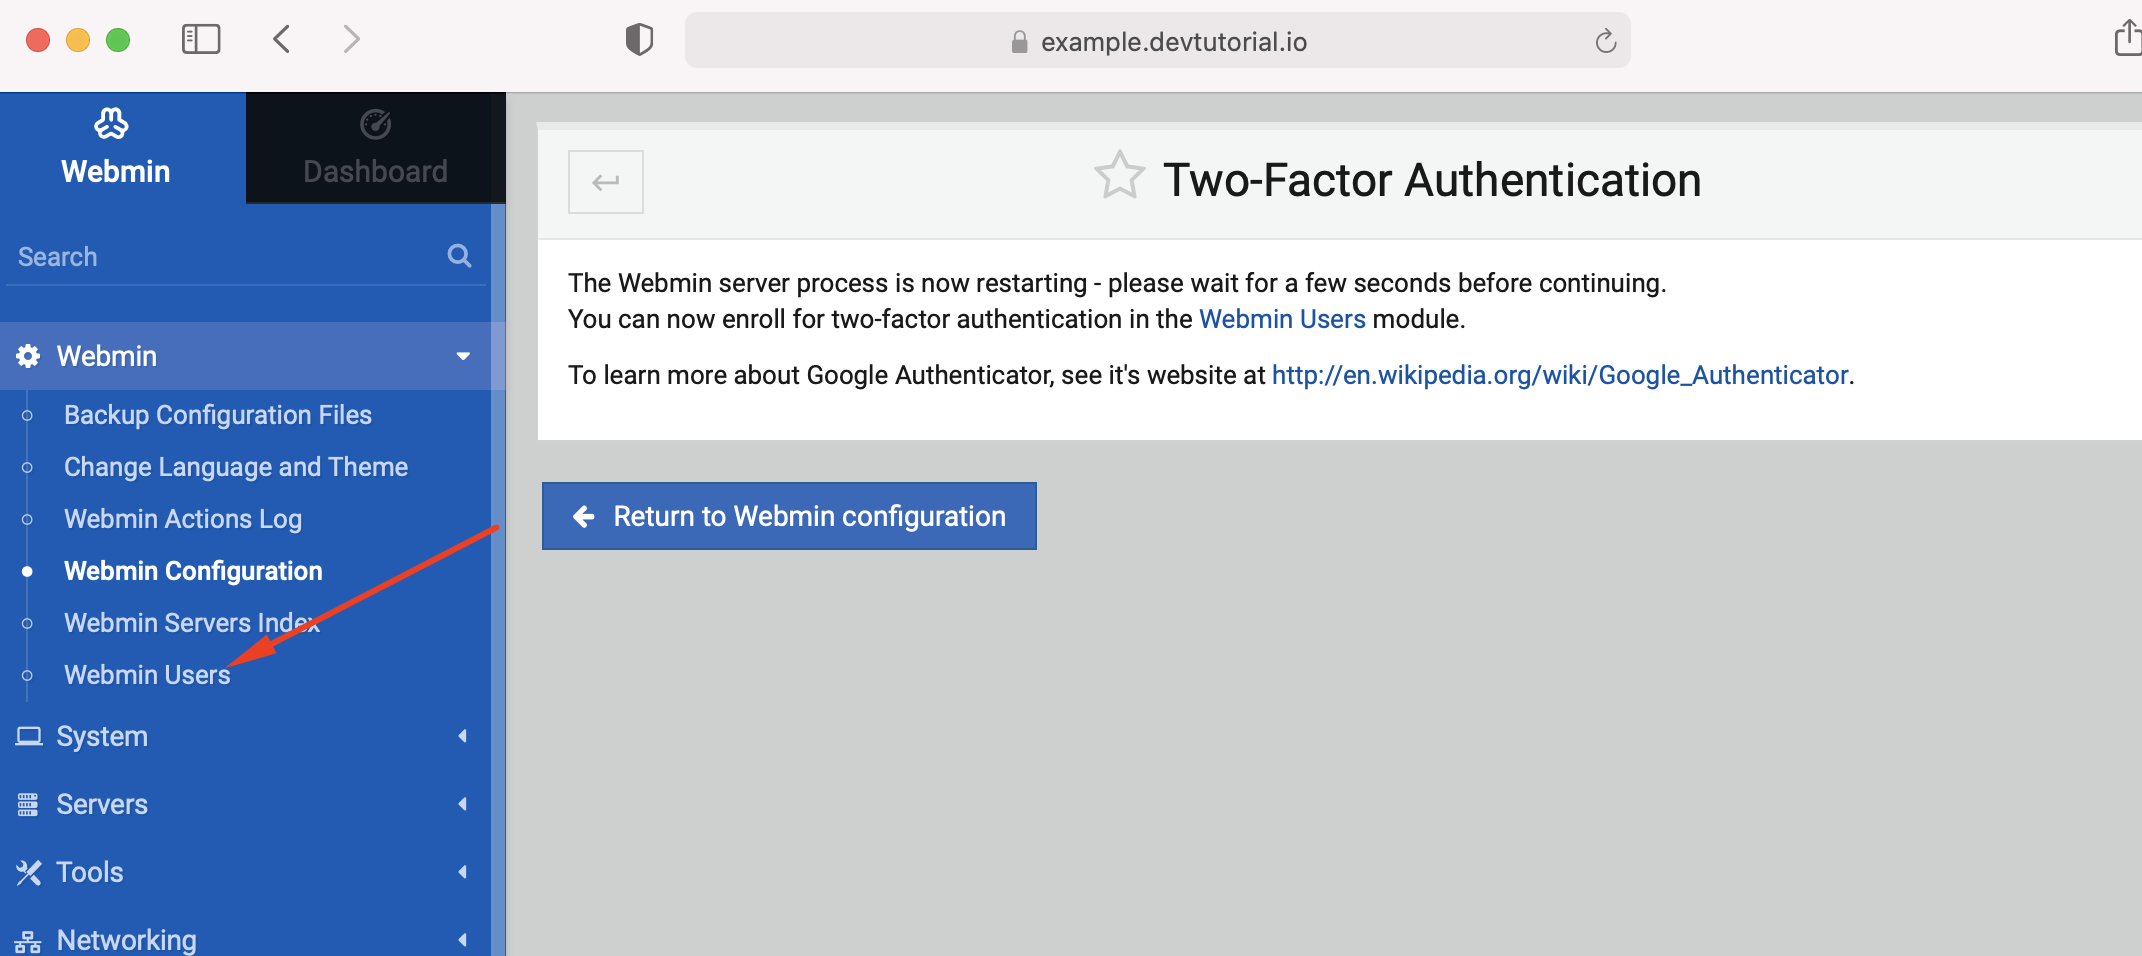
Step 7 : Below the Webmin menu on this web page, click the "Webmin Users" link.
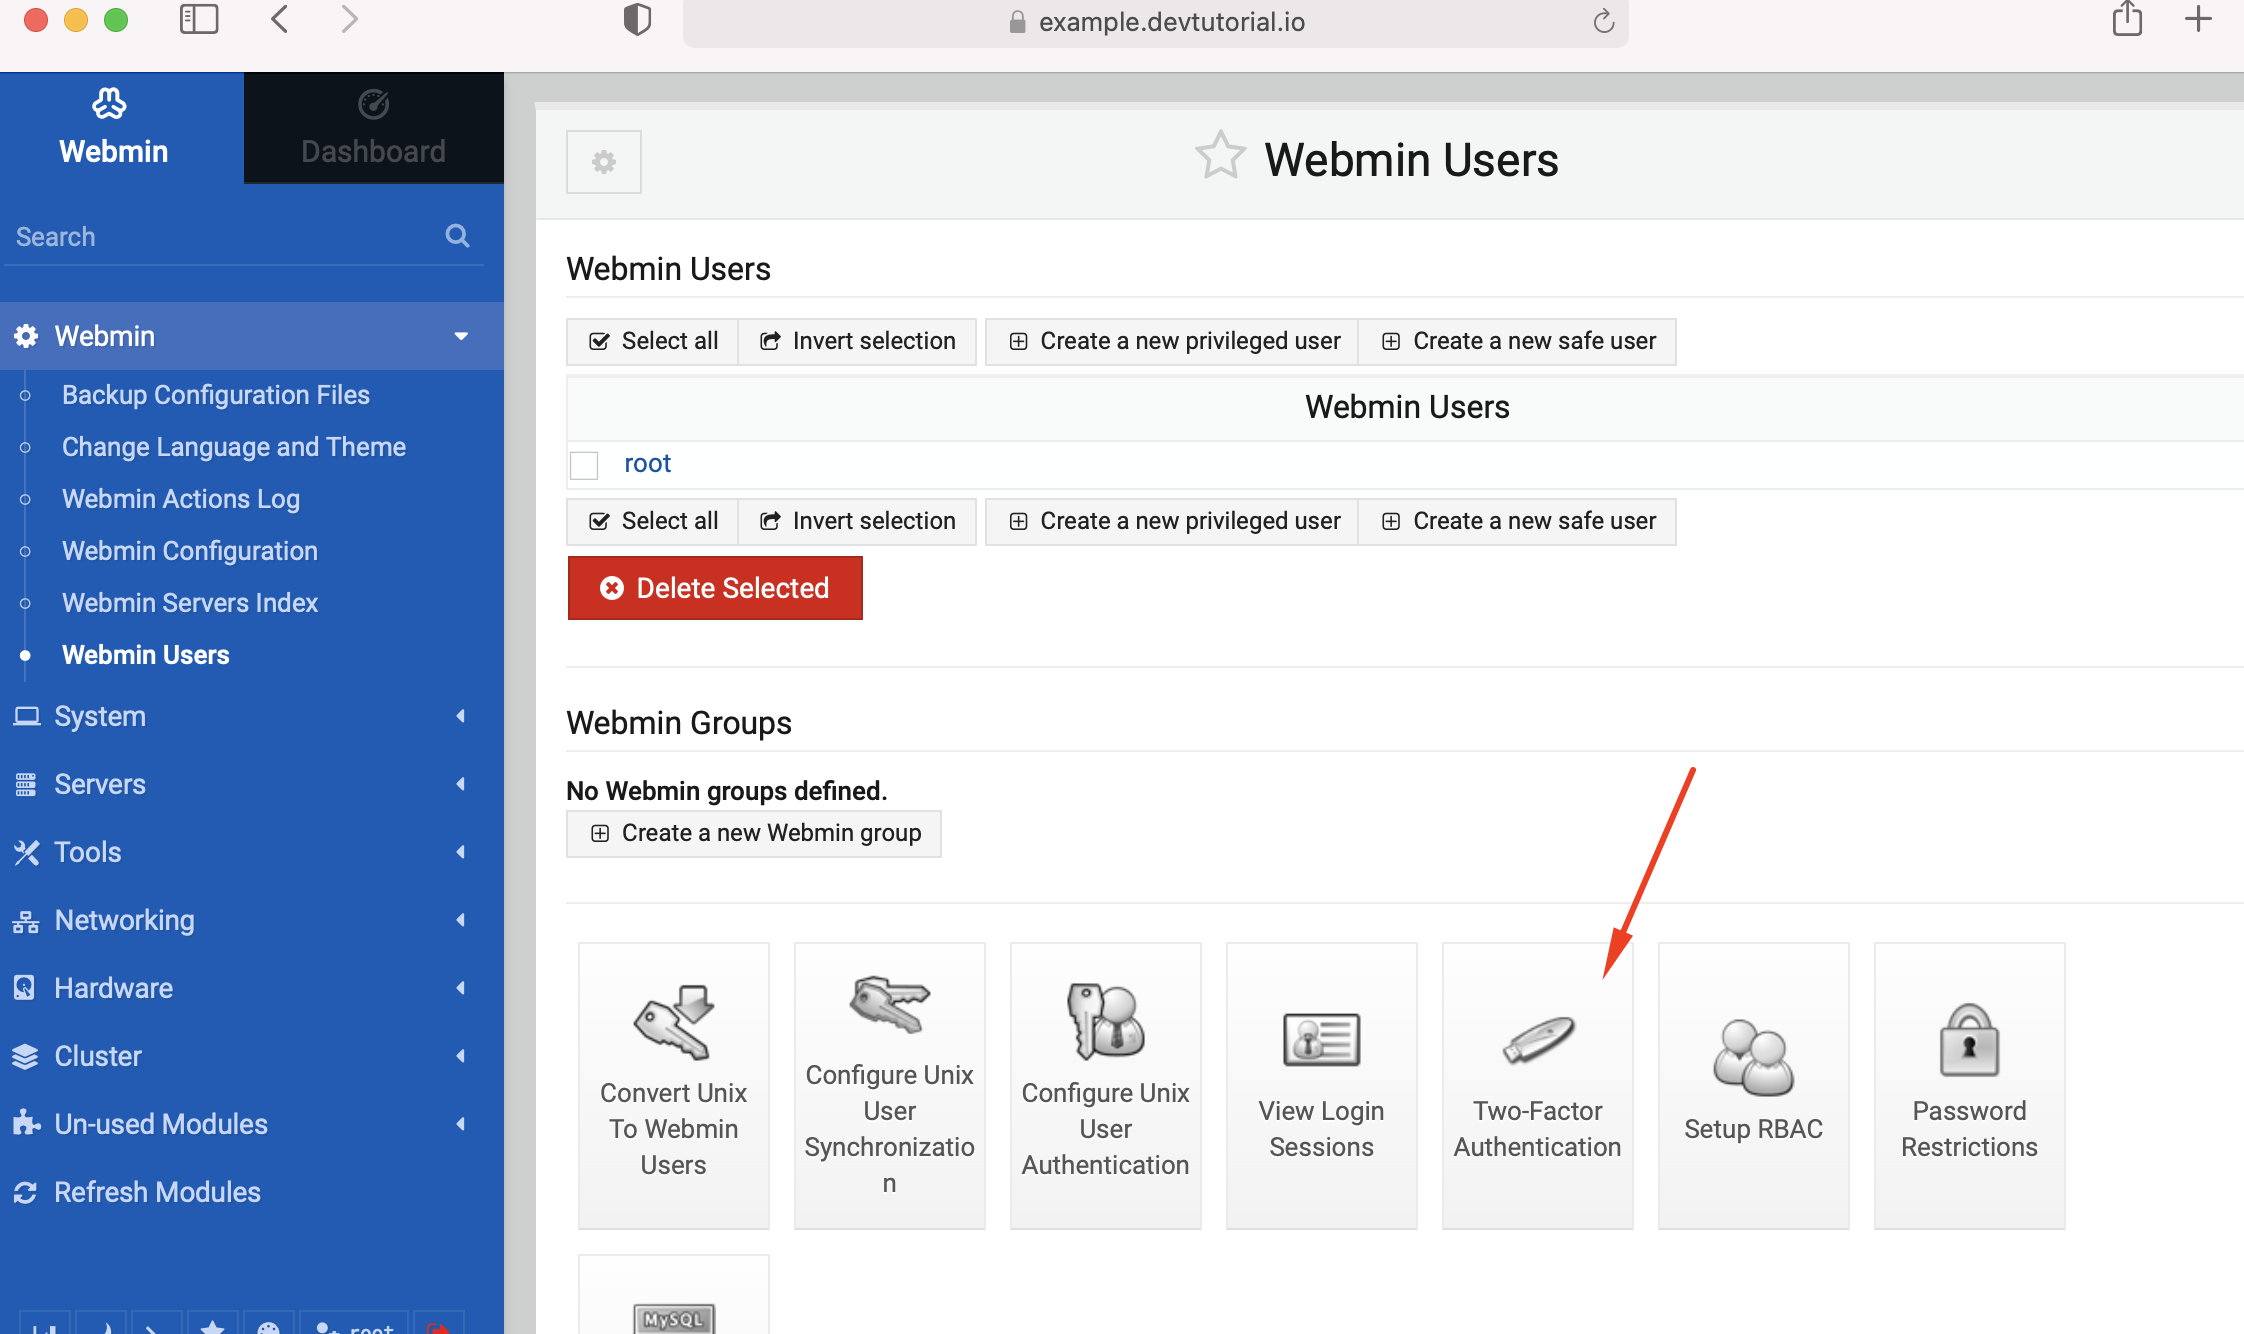
Step 8 : Select the "Two-Factor Authentication" button.
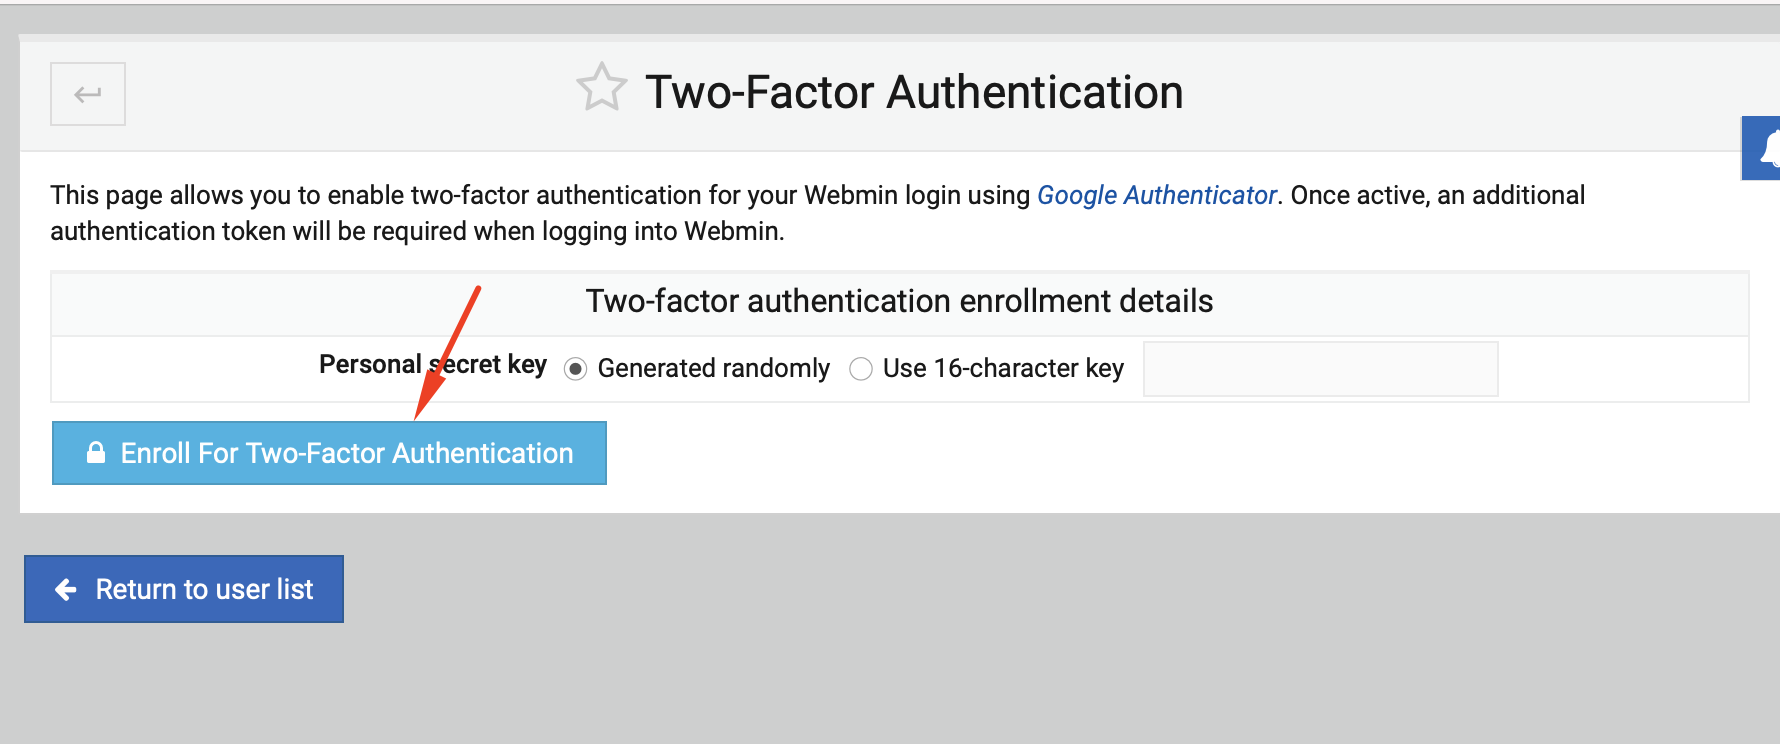
Step 8 : Select "Enroll for Two-Factor Authentication" button and click it. Enrolling an authenticator will require a compatible application that is installed on your mobile device, such as Google Authenticator. I would recommend Google Authenticator until other clients are fully compatible.
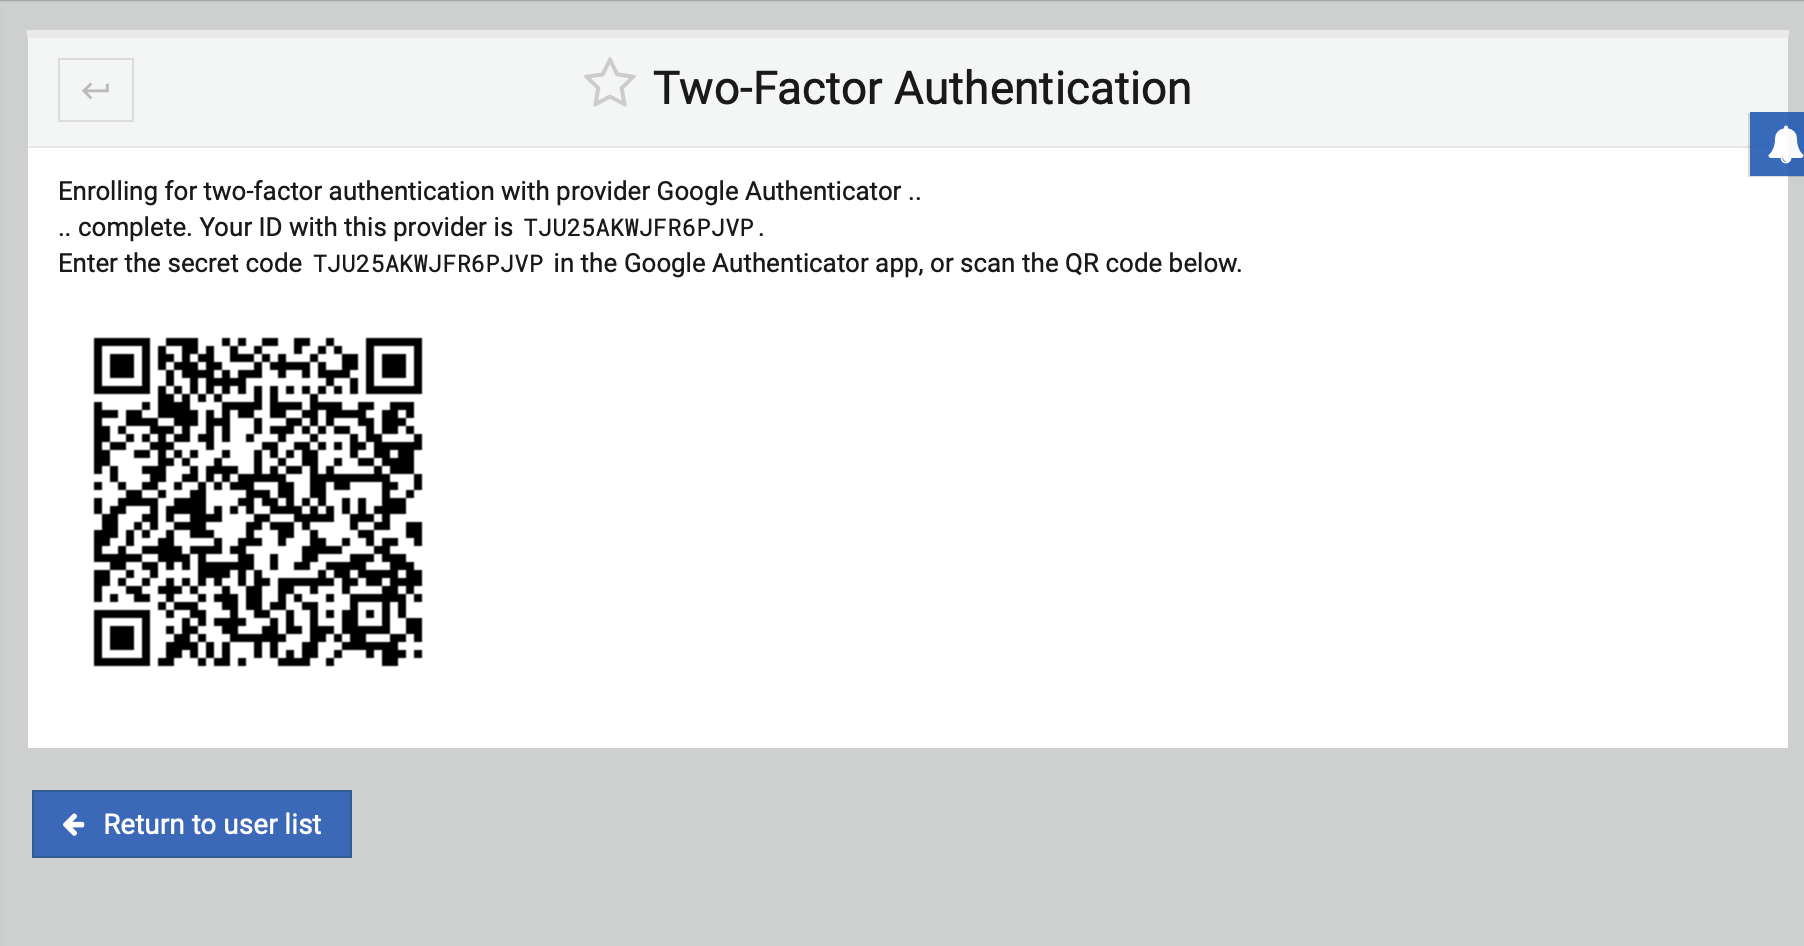
Step 9 : When you log in, use your two-factor authentication key as well as your username and password.
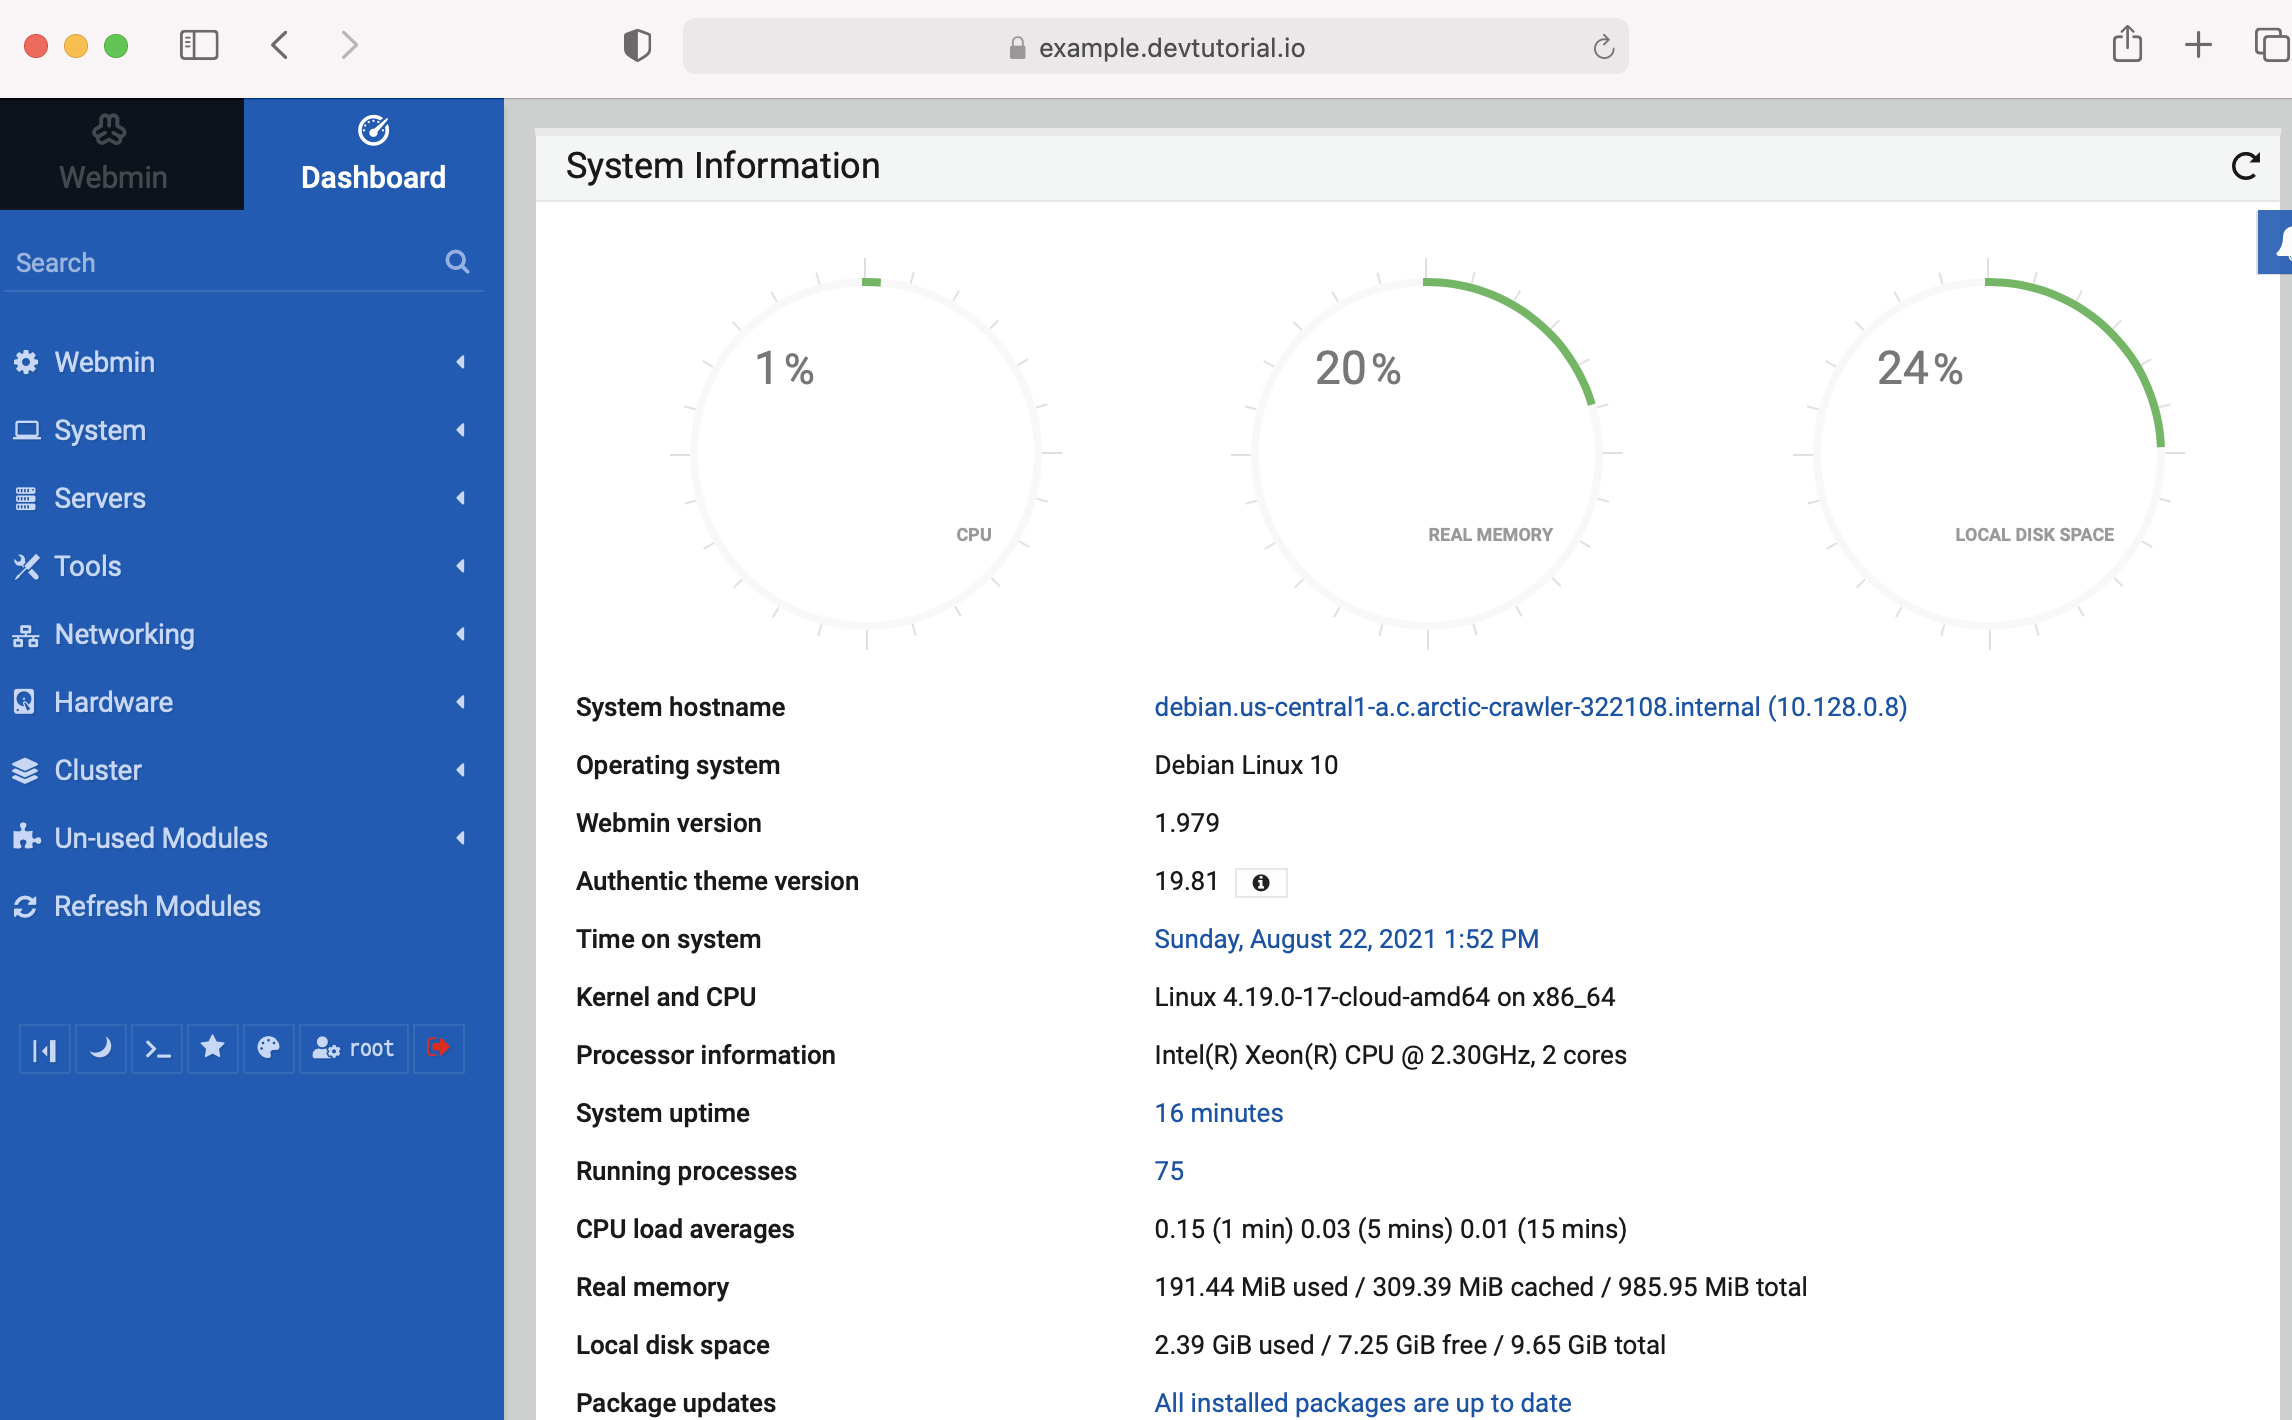
Installing Webmin with two-factor authentication enabled helps secure your Webmin installation.You may be able to save energy by shutting down Webmin when it is not in use and electing to have it automatically start up at boot.